
DVD-quality lessons (including tabs/sheet music) available for immediate viewing on any device.
Take your playing to the next level with the help of a local or online banjo teacher.
Weekly newsletter includes free lessons, favorite member content, banjo news and more.
Premier Sponsors





|
Please note this is an archived topic, so it is locked and unable to be replied to. You may, however, start a new topic and refer to this topic with a link: http://www.banjohangout.org/archive/173153/13
Page: 1 2 3 4 5 6 7 8 9 10 11 12 13 14 15 16 17 18
BungleBanjo - Posted - 09/24/2013: 16:42:05
I used a piece of 6 inch PVC pipe for my ring. It also got pulled in just a smidge. I've been thinking about experimenting with wooden rings. There were a few great examples at the beginning of this thread.
Noah Cline - Posted - 10/15/2013: 17:14:06
Banjo #2:
The cherry neck didn't turn out the way I wanted, and about the time I was working on it, I was given three big walnut boards.
So here is what's come out of two of them:
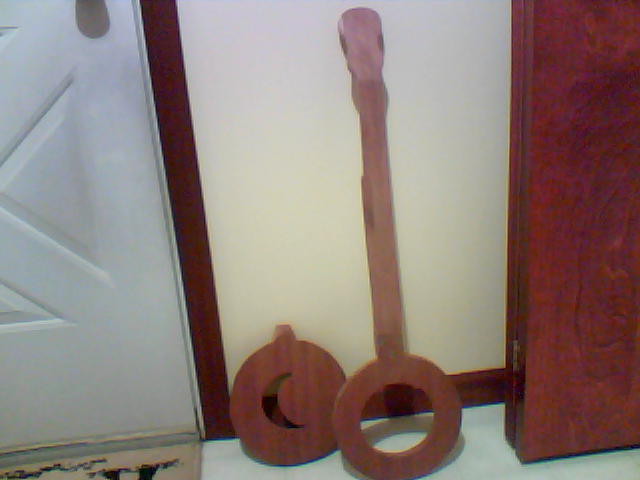 Mountain Banjo #2 | 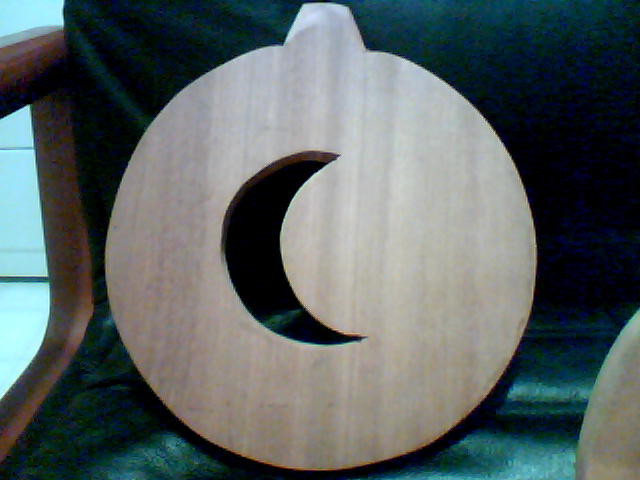 Back #2 | 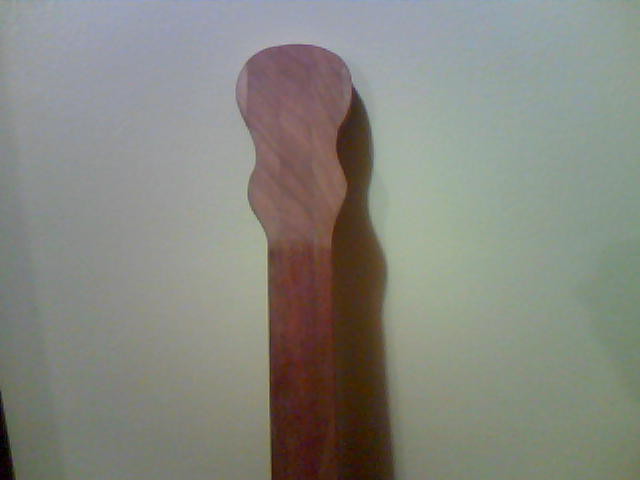 Peg head #2 |
BungleBanjo - Posted - 10/16/2013: 17:24:56
Looks great Noah! I like the moon shape you use for the back of your pots. What do you use for a finish? I used Tru-oil for my banjo #1 and loved the way it came out. I'm interested to hear what other people use...
Noah Cline - Posted - 10/16/2013: 17:50:58
quote:
Originally posted by BungleBanjo
Looks great Noah! I like the moon shape you use for the back of your pots. What do you use for a finish? I used Tru-oil for my banjo #1 and loved the way it came out. I'm interested to hear what other people use...
Turns out that the wood is actually mahogany, I believe, after doing some internet research.
Finish -- I used Minwax poly, but I don't care for it when I made the first one. It feels a little tacky, and I have noticed that it has come off some around first position. I originally wanted to use Tru-Oil, but couldn't find any. #2 will be finished with it, hopefully. My original neck for #2 was cherry, buut I made a couple of mistakes, a knot showing after being worked down being one of them, so I decided to just use the other piece of mahogany.
I also have contemplated a hand-rubbed or wax finish. I don't think I'll stain it as the color is nice where it's at.
Edited by - Noah Cline on 10/16/2013 17:51:24
rudy - Posted - 10/17/2013: 04:53:52
quote:
Originally posted by Noah Clinequote:
Originally posted by BungleBanjo
Looks great Noah! I like the moon shape you use for the back of your pots. What do you use for a finish? I used Tru-oil for my banjo #1 and loved the way it came out. I'm interested to hear what other people use...
Turns out that the wood is actually mahogany, I believe, after doing some internet research.
Finish -- I used Minwax poly, but I don't care for it when I made the first one. It feels a little tacky, and I have noticed that it has come off some around first position. I originally wanted to use Tru-Oil, but couldn't find any. #2 will be finished with it, hopefully. My original neck for #2 was cherry, buut I made a couple of mistakes, a knot showing after being worked down being one of them, so I decided to just use the other piece of mahogany.
I also have contemplated a hand-rubbed or wax finish. I don't think I'll stain it as the color is nice where it's at.
Noah,
I've used Minwax Wipe-on Poly Satin on close to 200 instruments and haven't experienced any of those problems. It's much more likely that there was something you did in a preparatory step that was incompatible with the finish. It's a great product, so I wouldn't want anyone to get the wrong idea about it's usefulness in musical instrument construction. I always personally recommend its use.
BungleBanjo - Posted - 10/17/2013: 15:42:59
Rudy, how do you think it compares to tru-oil? How many coats do you usually use on your banjos?
Noah Cline - Posted - 10/18/2013: 19:14:50
quote:
Originally posted by rudy
quote:
Originally posted by Noah Clinequote:
Originally posted by BungleBanjo
Looks great Noah! I like the moon shape you use for the back of your pots. What do you use for a finish? I used Tru-oil for my banjo #1 and loved the way it came out. I'm interested to hear what other people use...
Turns out that the wood is actually mahogany, I believe, after doing some internet research.
Finish -- I used Minwax poly, but I don't care for it when I made the first one. It feels a little tacky, and I have noticed that it has come off some around first position. I originally wanted to use Tru-Oil, but couldn't find any. #2 will be finished with it, hopefully. My original neck for #2 was cherry, buut I made a couple of mistakes, a knot showing after being worked down being one of them, so I decided to just use the other piece of mahogany.
I also have contemplated a hand-rubbed or wax finish. I don't think I'll stain it as the color is nice where it's at.
Noah,
I've used Minwax Wipe-on Poly Satin on close to 200 instruments and haven't experienced any of those problems. It's much more likely that there was something you did in a preparatory step that was incompatible with the finish. It's a great product, so I wouldn't want anyone to get the wrong idea about it's usefulness in musical instrument construction. I always personally recommend its use.
Rudy,
I may give it another go. It was the first time I had used. It probably was me when I applied it.
Edited by - Noah Cline on 10/18/2013 19:15:52
rudy - Posted - 10/18/2013: 20:07:14
quote:
Originally posted by BungleBanjo
Rudy, how do you think it compares to tru-oil? How many coats do you usually use on your banjos?
Brendan, I've used Tru-oil on several projects in the past. It's a very easy and forgiving finish, especially if you are careful with surface prep and are aware that you can have incompatibilities depending on what you try to use it with.
The biggest problem is trying to get any appreciable amount of build up. It's not unusual to need 15 or 20 coats if you're trying to get any amount of surface build. I'm not talking about any discernable thickness, just enough that I consider it a good finish.
The other problem is it is significantly less protective on softer woods like spruce, as in guitar, ukulele, or mandolin tops. It's not so much of a problem on banjos, but I like to use the same type of finish so I don't have to switch products depending on what I'm using it on.
The Minwax wipe-on satin poly is done after 3 coats 24 hours apart. If I'm in a hurry I'll do two 12 hours apart and the third coat the following day. I set it aside for 2 or 3 days and it's ready to assemble and complete. It's then best if you refrain from really rough handling for another week as a precautionary measure.
Noah, Be sure to practice on a test piece to check for any incompatibility issues with materials or the procedure you're using. Wipe it on thin and don't try for a thick build-up of finish for each coat. Do let it harden sufficiently between coats, and I try not to finish when it's really humid. You should end up with a durable hard finish a few days after the third coat and it will continue to harden for several days after that, but the finish should be plenty hard in a short time.
Edited by - rudy on 10/18/2013 20:13:20
ronwalker49 - Posted - 10/20/2013: 04:50:35
I have been using both products on my banjos and am really satisfied with the results...I built a hot box with a couple of light bulbs to help cure the finishes in...I made it about waist high so it doubles as an assembly table...
I stain first then put it in the box to heat the wood, then do a couple of coats of true oil, I have used boiled linseed oil instead of true oil also but it dries rougher and slower than tru-oil...This is not an issue if you have a hot box so when my true oil is used up I will probably not spend the money on more and will just use the linseed oil ...
After it is dry I steel wool and then do three coats of min wax poly (gloss), pretty heavy...The hot box has cut my finish time down by an incredible amount, maybe as much as 75%, especially in cooler weather...
I tried the min wax by it's self when I first read about it, and it really does work good, but I thought the finish lacked depth...The thing I hate the most about woodworking is sanding and after that is finishing...
This system has taken all the misery out of finishing...I don't mind it at all...I mix my stain the same color as a Mahogany stain pen that I bought at Menards so if I get a ding or scrape I can touch it up in a couple of minutes, and you can't even see it..
Randy--thanks for the tip on the min wax poly...I breathed enough lacquer fumes when I painted cars that I don't even want to smell it--clean the equipment-- or anything else associated with it again...Min wax poly is a down right wonderful alternative to it....
I got myself a large tin, a box of surgical rubber gloves, and cut a tee shirt up into small foldable pieces and that is my finishing kit...Use them once then throw them away, couldn't be easier, I love finishing now...
Edited by - ronwalker49 on 10/20/2013 04:59:30
Noah Cline - Posted - 10/27/2013: 14:21:00
#2 is finished.
There was one or two little flaws that I didn't encounter with the first build, but it turned out well, anyway.
Strung this one with steel.
Goat skin head.
Pot and neck is mahogany.
No finish, but just a natural stain.
Edited by - Noah Cline on 10/27/2013 14:21:58
 VIDEO: Falls of Richmond (click to view) | 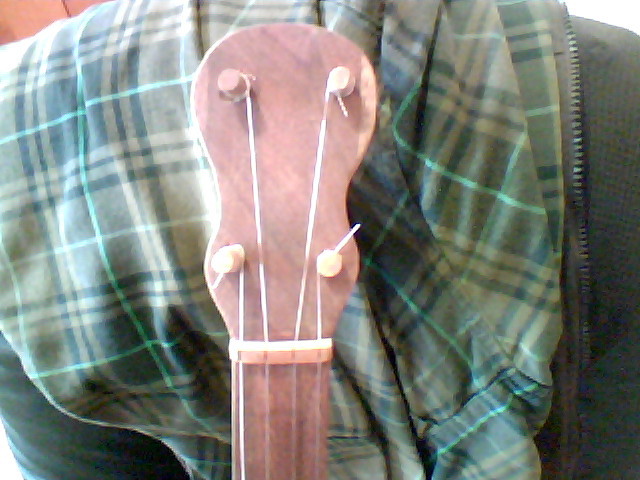 | 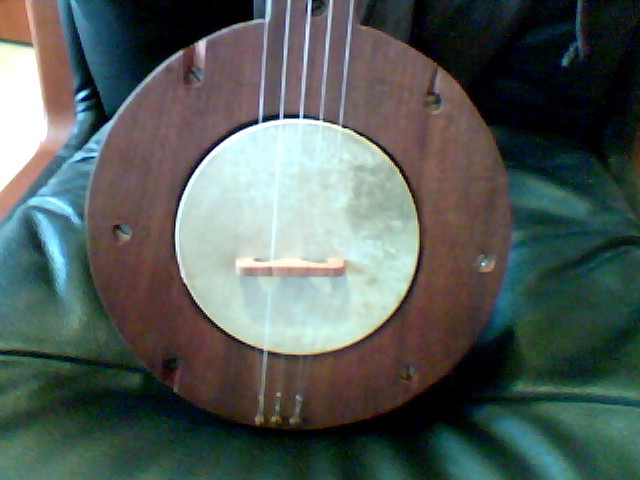 | 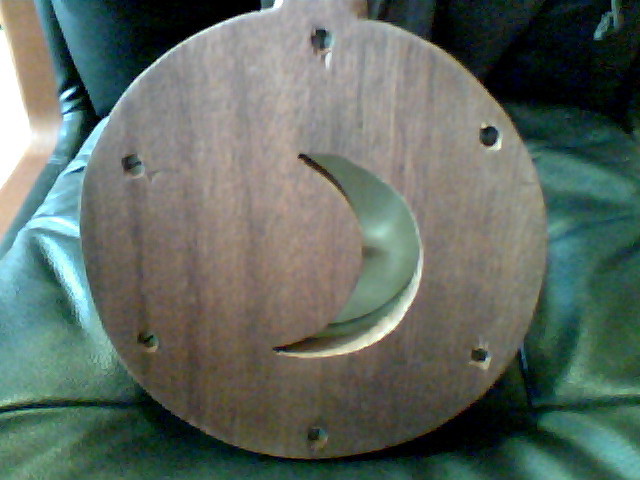 |
teebee - Posted - 10/27/2013: 15:48:31
Well, I got a new hearing aid last week. This sounds really good. Thanks for sharing.
TB
C Nyal de Kaye - Posted - 10/28/2013: 15:52:30
You are hooked Noah ... and the next ... and the next ...
You will soon need counseling mate.
Noah Cline - Posted - 10/28/2013: 17:19:53
quote:
Originally posted by C Nyal de Kaye
You are hooked Noah ... and the next ... and the next ...
You will soon need counseling mate.
Haha...good one. 
rudy - Posted - 11/02/2013: 10:22:47
MBers, Do make sure you're signed up for the BHO monthly drawing (November 2013) for a free Musicmaker's Mountain Banjo Kit. $300 value. It's listed on the home page:
sunrise - Posted - 11/09/2013: 11:51:44
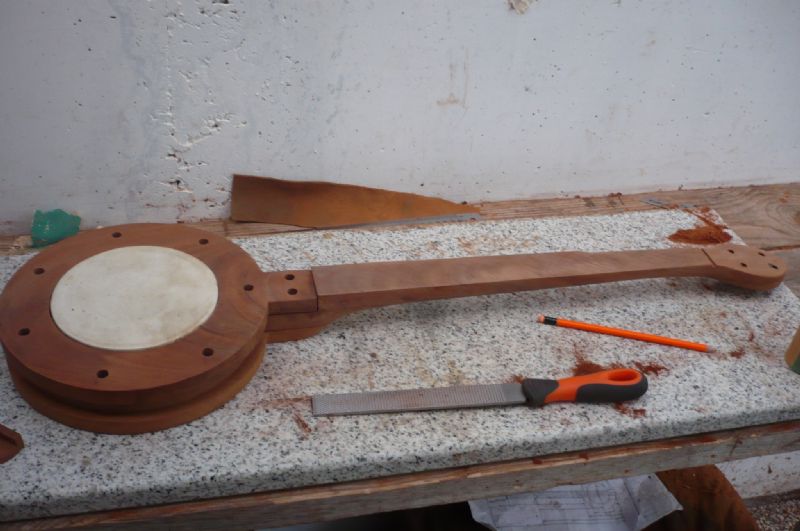
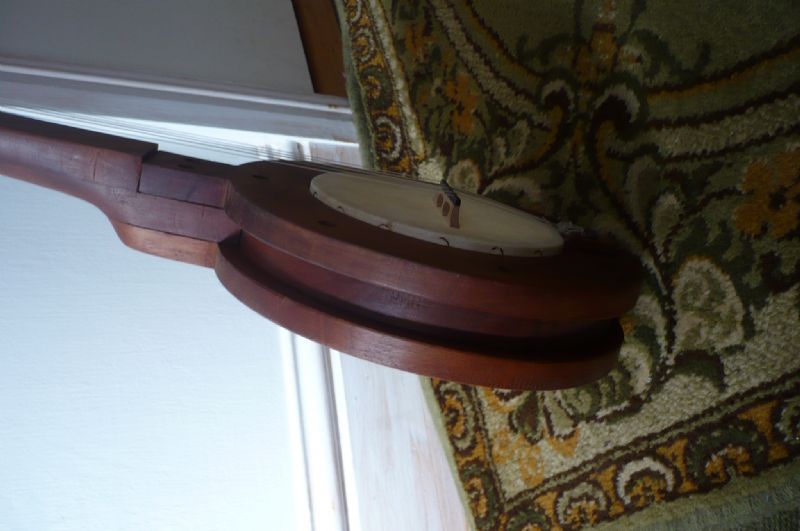
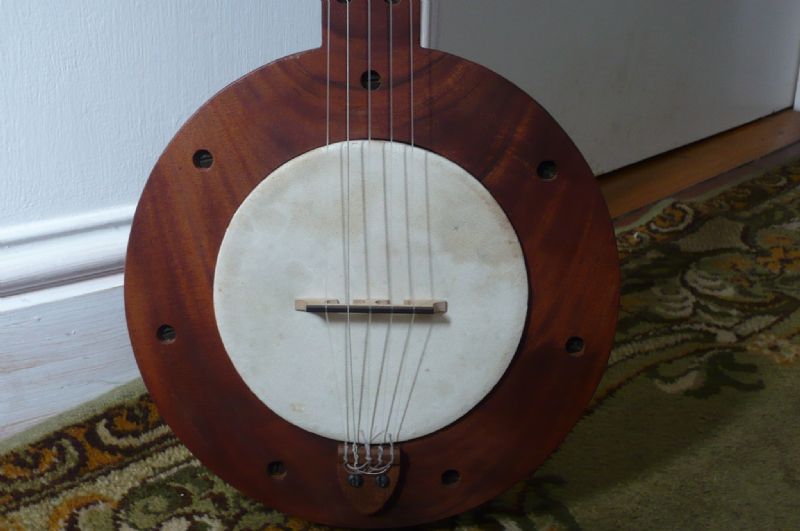
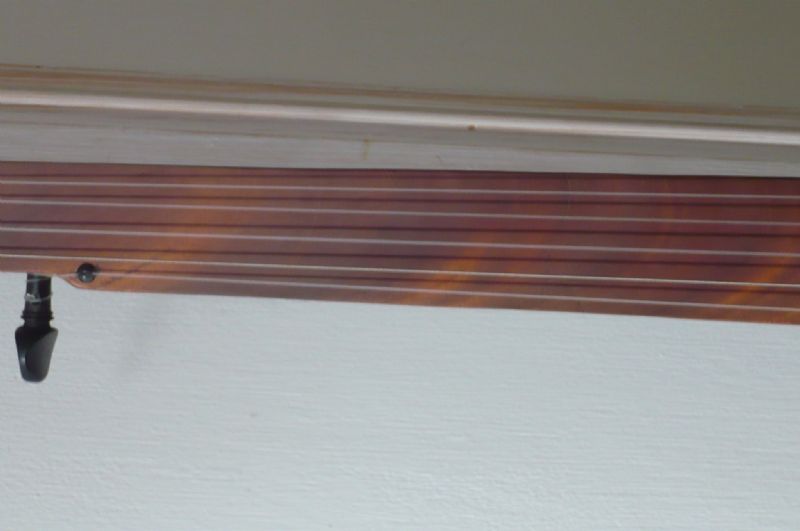
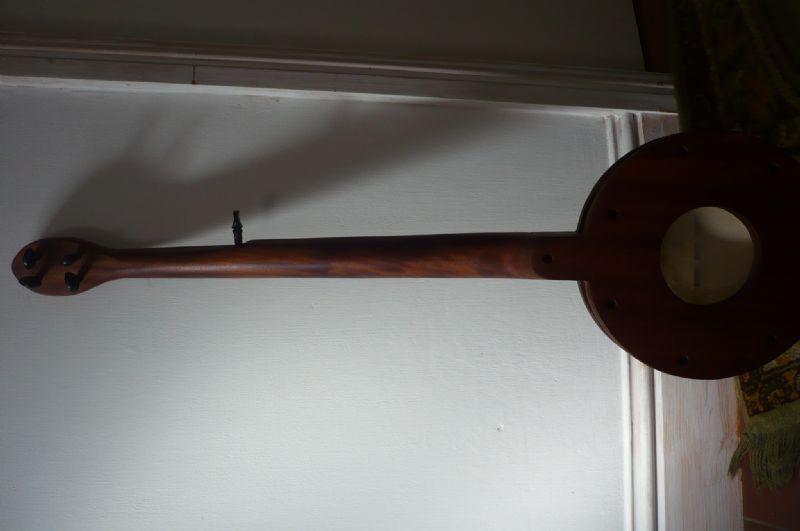
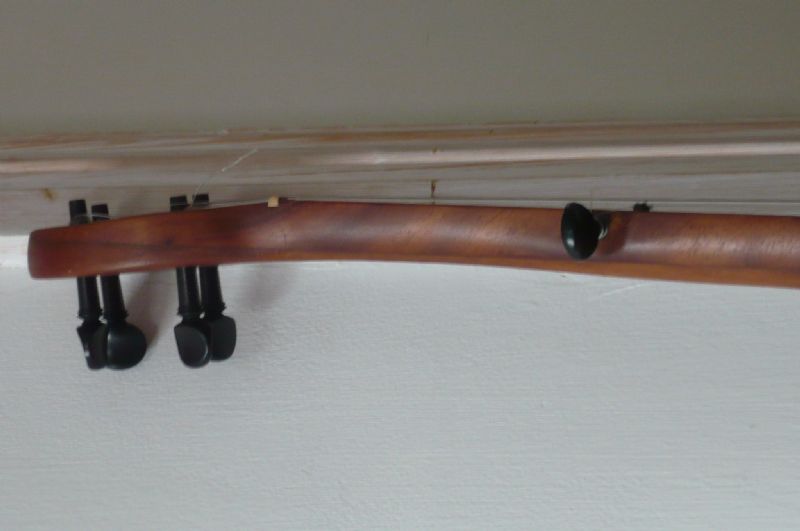
first things first . masssive thank you to Rudy for being able to inspect his plans . much appreciated Rudy. made this banjo early september . just found my camera lead so heres some photos . i put it together to get a feel for the neck shape and general fit but have nt played it much ; new to fretless and otherwise busy, but think i need to thin the neck a bit more . sounds nice , no way to put up a sound clip at the minute but it does ! it was a mahogany table top that had cracks so it seemed like the best thing to do . and a small tamborine
Edited by - sunrise on 11/09/2013 11:55:25
 |  |  |  |
 |  |
BungleBanjo - Posted - 11/10/2013: 12:42:35
Neighbour,
Looks beautiful! Nice work. Love to hear a sound clip when you get the time
XyloTwang - Posted - 11/22/2013: 15:58:15
This thread is amazingly inspiring. It is what brought me to the BHO. I have read it through several times. Yes perhaps I need to get a life. I also have foxfire 3 and have spent considerable time on Rudy's amazing and generous site. Thank you Rudy!
I am in the process of building my first. Already speculating on what I will do different next time.
Mine is being built from scrap wood I acquire from a local furniture producer so it has been a bit challenging at times. Great wood available; walnut, cherry, maple, and mahogany mostly. Dimensions are the tricky part. A lot of what I get is great for kindling in the fireplace or is destined for the sugaring arch. Large chunks of wood but either wicked cupped or checked, or... Or the pieces are smaller or thinner but great wood. The other limiting factor is learning to work with the tools I have available. I have a decent set-up just not always sure the best course of action for this project. Luckily I do have a woodworker friend who has helped me out when I could not figure out how to go forward. Industrial size drum sanders are great! However I kind of would like to be self reliant and feel guilty bugging him... I barter with homebrew so I don't feel a total leech.
So far I have the pot mostly ready for assembly. Needs some sanding. Neck blank is glued up and traced awaiting rough cutting. Attempting to rig up a thickness sander with my bench top belt sander to thickness a really pretty piece of figured walnut for a fingerboard/headstock veneer.
Question for folks. How tight is the clearance between tension ring and the ID of the top piece hole? I had some trouble cutting a clean symmetrical hole and had to clean it up a bit. For a tension ring I am using a piece of a tin can I got from the school cafeteria, so the diameter was predetermined. I was careful to size the hole the same knowing there would be some need for sanding etc. so there is not a huge gap. I guess I won't know how much until I try and fit the skin. Should it be snug or is some gap alright?
C Nyal de Kaye - Posted - 11/22/2013: 16:23:02
I cannot answer your question XyloTwang, but I am very pleased to read about your project and to "see" your enthusiasm.
Keep us informed of your progress and every good wish for it.
cbcarlisle - Posted - 11/22/2013: 22:07:19
Like most things, it should be snug, but not too snug; there can be a gap, but not too much gap.
Seriously, there has to be room for the skin (variable) but if it's too tight I have seen old pots crack when they (eventually) shrink.
XyloTwang - Posted - 11/23/2013: 07:08:19
Too much gap is more what I am concerned about. Won't know until I soften the head and try to fit it though. Time will tell. Supposed I should get cracking on the neck.
Next one I would love to use a synthetic head. I really like the adjustable wood tension ring designs folks have on here. I have not figured out how to accomplish one as of yet having neither lathe or drill press/sanding drum as an option.
chip arnold - Posted - 11/23/2013: 14:29:36
You can get away with a pretty large gap. The head tension and stability is determined by your tacking of the head and the degree of stretching when assembling the pot pieces. If you have way too much size discrepancy so that the looks will be adversely affected you may be able to find a slightly larger tension ring. Your tin can is probably 6" in diameter. Go to a plumbing supply and ask for a 6" PVC "union". This is used to join two 6" PVC pipes together. It will be some larger than 6" in outside diameter and It will be about 9" long, so you can cut two or three stretchers from it. You can cut in with a handsaw or your table saw. You'll get a better tone from the PVC than from a tin can, too.
Check out my Mtn banjos on my photo page. These have PVC stretchers.
mikeyb2 - Posted - 11/24/2013: 15:15:54
My mountain banjo is nearing completion at last . I am ready now to fit the goatskin head and have decided to do it the Hicks way by attaching it to a metal ring. The Hicks plan shown on an earlier page of this thread, details the skin stitched onto the ring, but the stitches are meant to be loose. Is there any reason why staples couldn't be used instead of thread? Has anyone done this ?
Edited by - mikeyb2 on 11/24/2013 15:17:00
rudy - Posted - 11/24/2013: 17:46:15
My limited experience with hide would support the idea that a small or sharp object retaining the head allows the skin to be cut or pulled out much easier than a large thread or rounded shaft of a large tack would. Staples would present a fairly sharp and small edge to the head perforation.
C Nyal de Kaye - Posted - 11/24/2013: 18:45:15
I have initially tacked down skin heads on gourd banjos with staples. They worked well each time, are easily removed and leave almost imperceptible holes. The good thing is that you only need one hand to stretch the skin and hold the skin whilst the other fires off the staple.
Noah Cline - Posted - 11/24/2013: 20:06:26
#3 is getting close to being finished, and is similar to #2 (all mahogany). I have this week off for Thanksgiving from school, so hopefully I'll get it completed, and maybe start on a piece of cherry for the neck for #4. #3 will have Grover Sta-Tites and a metal friction fifth. Yes, I like the look of wooden fiddle pegs, but I really don't have the means of making them accurate enough, though I've gotten it to work a little before. I have seen a video of a guy shape them with a belt sander, then using a shaper.
XyloTwang - Posted - 11/25/2013: 04:59:42
quote:
Originally posted by mikeyb2
My mountain banjo is nearing completion at last . I am ready now to fit the goatskin head and have decided to do it the Hicks way by attaching it to a metal ring. The Hicks plan shown on an earlier page of this thread, details the skin stitched onto the ring, but the stitches are meant to be loose. Is there any reason why staples couldn't be used instead of thread? Has anyone done this ?
My understanding of your question is that you wish to attach the skin to a wire hoop rather than tacking it to the wood as is shown in the foxfire book? Correct? If so I am unclear how staples would work to bind the skin to a metal hoop.
I was also thinking of going this route. My understanding is that by attaching the hoop to the skin the hoop gets trapped under the top wooden piece as it goes together. This serves the same function as attaching the head directly to the wood, however, it is easier to remove as the hide/hoop are one unit and come out when the wood pieces are taken apart. The reason it would seem that the thread is only loosely stitched is that it is only necessary to give the ring a purchase on the hide and not make any more holes than necessary. I am not sure I can envision how staples (regular paper or from a heavy duty gun) will hold the hide to the ring. Perhaps I am not thinking of the same staples you are?
mikeyb2 - Posted - 11/25/2013: 05:10:53
quote:
Originally posted by XyloTwang
quote:
Originally posted by mikeyb2
My mountain banjo is nearing completion at last . I am ready now to fit the goatskin head and have decided to do it the Hicks way by attaching it to a metal ring. The Hicks plan shown on an earlier page of this thread, details the skin stitched onto the ring, but the stitches are meant to be loose. Is there any reason why staples couldn't be used instead of thread? Has anyone done this ?
My understanding of your question is that you wish to attach the skin to a wire hoop rather than tacking it to the wood as is shown in the foxfire book? Correct? If so I am unclear how staples would work to bind the skin to a metal hoop.
I was also thinking of going this route. My understanding is that by attaching the hoop to the skin the hoop gets trapped under the top wooden piece as it goes together. This serves the same function as attaching the head directly to the wood, however, it is easier to remove as the hide/hoop are one unit and come out when the wood pieces are taken apart. The reason it would seem that the thread is only loosely stitched is that it is only necessary to give the ring a purchase on the hide and not make any more holes than necessary. I am not sure I can envision how staples (regular paper or from a heavy duty gun) will hold the hide to the ring. Perhaps I am not thinking of the same staples you are?
You're exactly right with the process, but to use staples I would fold the skin over the wire loop as you would if stitching. Then just use paper staples to go through the 2 layers of folded skin, thus enveloping the wire loop. The staples would have to be placed as close to the loop as possible, and maybe a dozen or so evenly spread around. I have not decided yet whether to go down this route, but that's the way I see it.Thanks
XyloTwang - Posted - 11/25/2013: 06:14:08
Oh good, glad I wasn't too off track !
!
Perhaps if you have a scrap of hide to spare you could attempt to staple a folded piece first. I am imagining it may be tough to go through two layers of hide and close the staples even when damped. If that works alright give it a try with the actual head. You could always pull the staples if it doesn't seem to be holding well enough and then use thread through the holes the staples made.
Can't wait to see the finished product. Good luck.
XyloTwang - Posted - 11/25/2013: 06:17:34
oh, and perhaps take/post pictures of the process for posterity whatever the outcome?
Noah Cline - Posted - 11/25/2013: 08:09:36
I've also wanted to try the way Stanley Hicks did it with the metal ring. Tacking it in works for me.
mikeyb2 - Posted - 11/25/2013: 09:56:40
Well, today I took the plunge and fitted the head, but went down the stitching route( cowardly I know.)The stitching wasn't easy and probably next time I would try staples. Too late for pictures but what I used was a 6mm aluminium rod which I bent into a circle round a paint can. I then cut the skin so it was an inch all round larger than the ring, and then stitched with heavy thread( after soaking the skin for 10 minutes). I inserted the skin into the pot and put my tambourine hoop tone ring into it. I then put the back on top and put in the screws and screwed loosely the small amount of screw thread that was able to grip, I did this mainly to line up the back properly before putting it into the press I'd made for this purpose. The press was two sheets of mdf with 8 bolts and wingnuts, and had holes drilled out to allow access to the screws. I tightened the wingnuts a bit at a time then tightened the screws a little , then repeated the process until closed. This was my first experience at doing this and I was surprised how tough it was, it seemed to take forever. The part near the heel didn't quite want to close so, I tightened all the screws up and released it from the press to check to see what the head looked like. It seems quite acceptable, but tomorrow I think I'll add one more screw to the heel to close that up as it's only a smidges. I'll add some pictures in the next few days.
I got the idea for the press from this video:youtube.com/watch?v=rix6LfdLlnc
Edited by - mikeyb2 on 11/25/2013 09:58:55
mikeyb2 - Posted - 11/26/2013: 08:34:35
Oops! Disaster. After looking carefully I noticed the new head had split round the edge of the tone ring at the stitches. As i said in the last post it was very tight and I think too much tension was required to close the back and stretch the head. I'll have to rethink. Maybe there wasn't enough skin between the loop to allow for the required amount of stretching. Maybe I stitched the skin too tightly onto the aluminium ring and should have made it quite loose, I'm not sure. I suppose attaching the skin directly to the inside of the pot(without a ring) would give more surface area to the skin to allow for the required amount of stretching. Anyway, there's a new skin on it's way!
ronwalker49 - Posted - 11/26/2013: 09:43:58
I have been wondering about that very thing...Been wanting to make one for some time, but have not been able to figure out how to control the tension thing...I am thinking that anything less than "tight" will sacrifice sound--volume & tone...It seems like one of those "feeling" things that almost guarantees a certain amount of failure until you get the hang of it... 
XyloTwang - Posted - 11/26/2013: 10:50:18
I recall reading in the foxfire book about a method one maker had for dealing with this issue. Though I am not sure I quite understand it so I may not describe it correctly. I also can't remember which maker it was either...
A disc of wood (I think it was) is placed on the work surface in the middle of the hole of the top piece. The hide is laid on top of it. Then the rest of assembly is completed with whatever form of attachment being used. The small disc, or block serves to put just enough slackness in the head so that as it dries it does not pull too tightly. I don't think it specified the dimensions of the piece so that is one of my uncertainties.
mikeyb2 - Posted - 11/26/2013: 12:56:28
quote:
Originally posted by XyloTwang
I recall reading in the foxfire book about a method one maker had for dealing with this issue. Though I am not sure I quite understand it so I may not describe it correctly. I also can't remember which maker it was either...
A disc of wood (I think it was) is placed on the work surface in the middle of the hole of the top piece. The hide is laid on top of it. Then the rest of assembly is completed with whatever form of attachment being used. The small disc, or block serves to put just enough slackness in the head so that as it dries it does not pull too tightly. I don't think it specified the dimensions of the piece so that is one of my uncertainties.
I've just been thinking along those lines after reading an earlier page about somebody allowing the loose skin to be fitted so that it is 1/4 inch short of being flush with the top piece, before it is stretched. So I thought if I put a small circular piece of wood 6 X 1/4 inches on the bench, then the banjo face down over it, I could maybe press another piece the same size into the skin and press it down into the pot so that the skin is sandwiched between the wood circles. I could then tack or staple it to the sides of the pot, thus giving enough slack so the skin can be stretched enough but not too much. Or something similar.
Dubl-M - Posted - 11/27/2013: 04:37:21
I think Chip is recommending a coupling, not a union, for a slightly larger stretcher. I got to see a couple of Chip's mountain banjos at Clifftop. Clever fellow that Chip. Purty banjars too.
Noah Cline - Posted - 11/27/2013: 11:28:59
quote:
Originally posted by XyloTwang
I recall reading in the foxfire book about a method one maker had for dealing with this issue. Though I am not sure I quite understand it so I may not describe it correctly. I also can't remember which maker it was either...
A disc of wood (I think it was) is placed on the work surface in the middle of the hole of the top piece. The hide is laid on top of it. Then the rest of assembly is completed with whatever form of attachment being used. The small disc, or block serves to put just enough slackness in the head so that as it dries it does not pull too tightly. I don't think it specified the dimensions of the piece so that is one of my uncertainties.
Tedra Harmon used it. Just pulled out my Foxfire and looked to see, but he never mentioned the size of the disc.
chip arnold - Posted - 11/27/2013: 16:02:31
I use a 1/4" thick disk and tack/assemble as fast as possible to keep the head good and wet. If for some reason, it starts to dry while I'm working, I wet it in place with warm water. I have a jig which holds the stretcher in place inside the top piece as I tack, allowing me to pull the head up snug as I go. I am able to pull it all together with the screws. I never use clamps. If you need clamps, the head is too tight.
mikeyb2 - Posted - 11/28/2013: 08:20:41
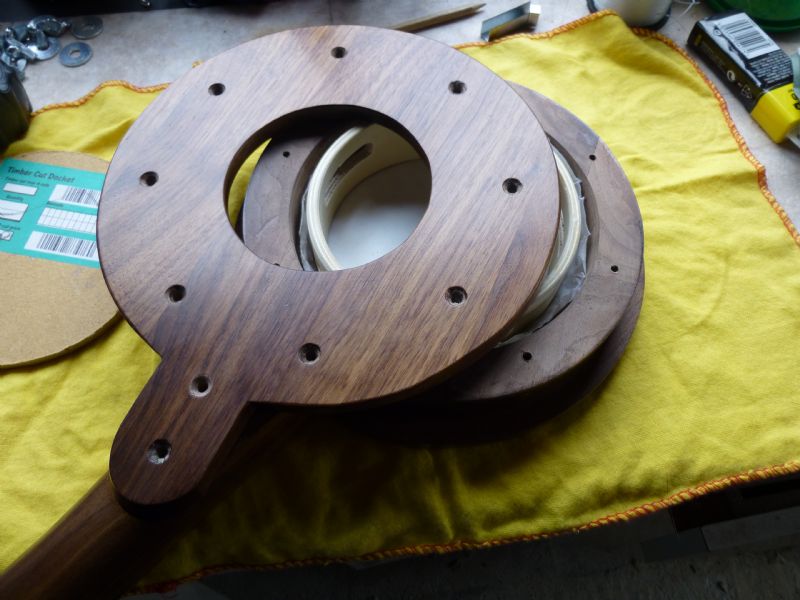
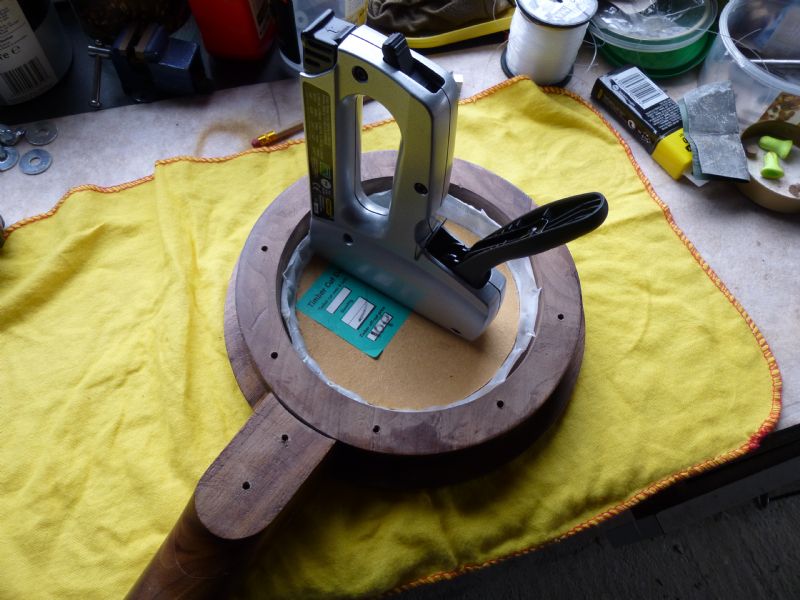
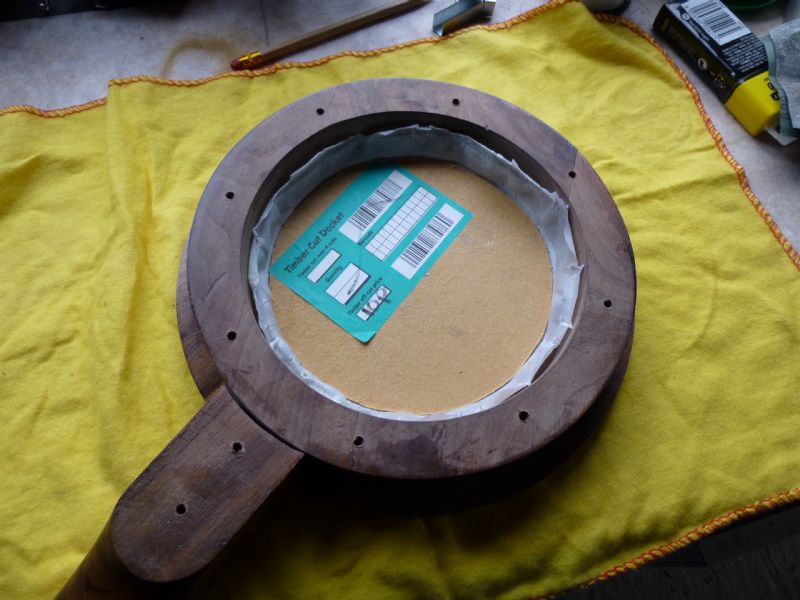
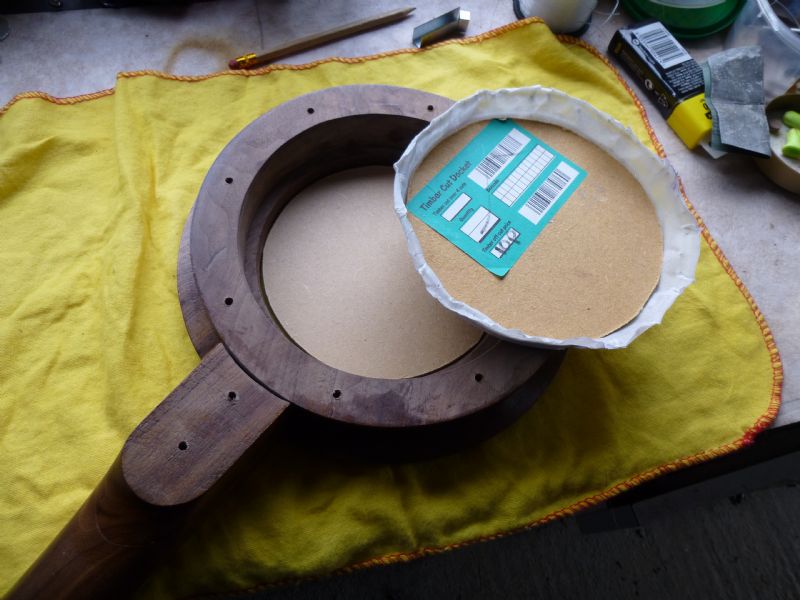
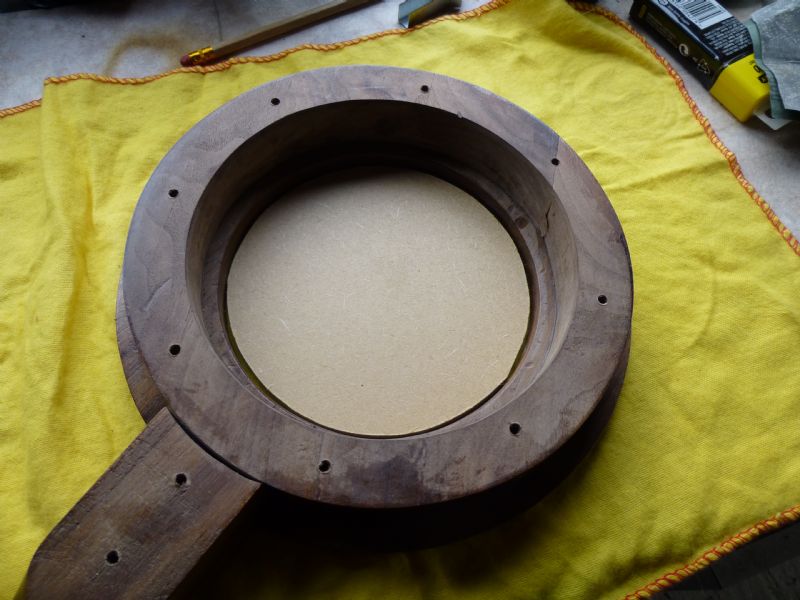
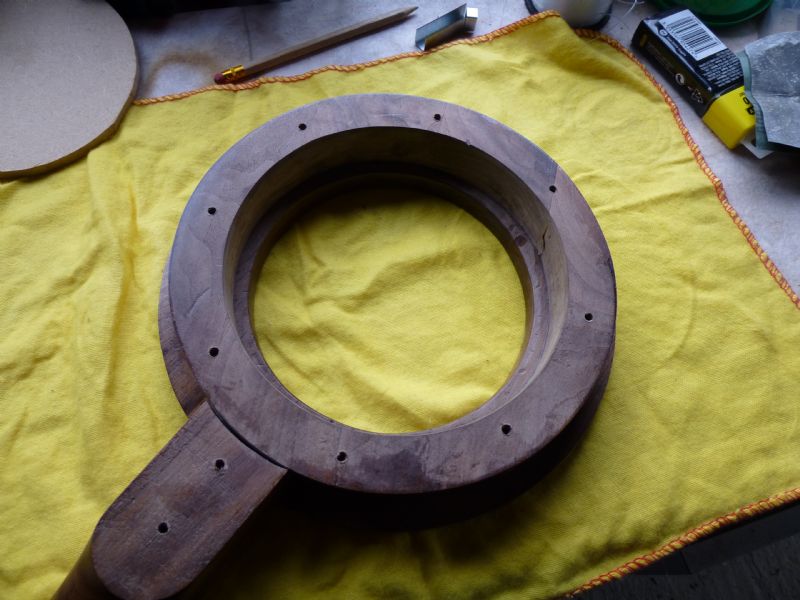
I made 2 discs today and intend to use them as in the photos. Hopefully this might work ok. I've abandoned the hicks method and will staple to the inside of the pot. The skin seen is the one that split and was used for the photo to demonstrate. For some reason the photos are in reverse order.
Edited by - mikeyb2 on 11/28/2013 08:24:20
 |  |  |  |
 |  |
chip arnold - Posted - 11/28/2013: 19:13:49
Mickey, I want to suggest to you that you don't staple/tack to the inside of the hole. Staple to the underside of the upper pot section. It will be MUCH more likely to hold. Also, be sure to use white glue along with the staples/tacks. After all is dried and stretched, the glue will do most of the holding. It looks as though you'd have to get a new head to properly tack it to the underside. It will be worth it.
mikeyb2 - Posted - 11/29/2013: 08:39:43
Chip, thanks for the advice. I'll add some glue like you say, but my earlier mistake of making the rim thicker than it should be, has not left a wide enough area on the back of the top plate and there is no room for the stapler to fit in that way so I'll take a chance on stapling to the rim. I think this time should be better now the tension will be greatly reduced. Watch this space!
rudy - Posted - 11/29/2013: 09:00:23
You can zoom in to the plan detail on the Proffitt-style plan at the Bluestemstrings.com website to clarify the detail Chip is referring to about head mounting. The 90 degree angle of the rim edge that the head stretches over serves to hold much of the head tension so the tacks don't have to hold all of the head tension produced as the hide shrinks and tightens.
It looks like you could route out enough of the inner rim to form the appropriate shape for head mounting. You wouldn't need much more to achieve a wide enough purchase for the head.
This is one of the "finer points" of hide head mounting and it sometimes takes a bit of experience to realize the reasoning for why the rim is designed as it is. There is certainly something to be said for examining a plan and thinking about why the typical mountain banjo design often incorporates some form of strain relief for the head. At the very least these discussions are great (particularly in this long-running topic) because it allows others the chance to learn from the experience of others.
Edited by - rudy on 11/29/2013 09:03:47
mikeyb2 - Posted - 11/29/2013: 09:27:49
Rudy, I fully understand what Chip is suggesting, but I just thought I might get away with attaching to the rim. I bow to your better judgement and experience( and Chip's) and this is my first build, so I shall endeavour to do it as per the plans. I'll try and figure something out tomorrow. I've just found another stapler which does fit the pot, so 'll do a bit of experimentation on some scrap timber. Thanks Mike
Noah Cline - Posted - 11/29/2013: 13:28:48
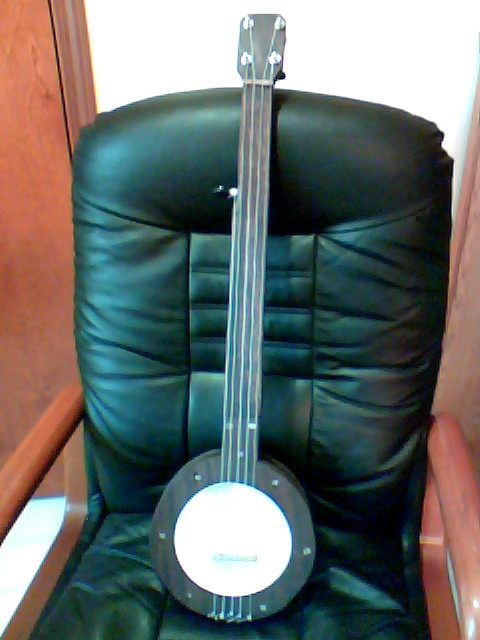
Think I'm getting the hang of it, but still have a couple of "bugs to work out of the woodwork."
Just finished #3. Neck's still a little tacky, but it looks and sounds very good.
All mahogany (like #2, but stained with a walnut stain).
Grover tuners; friction fifth peg
Nylgut Classicals
6" goat skin head
Edited by - Noah Cline on 11/29/2013 13:30:36
 #3 | 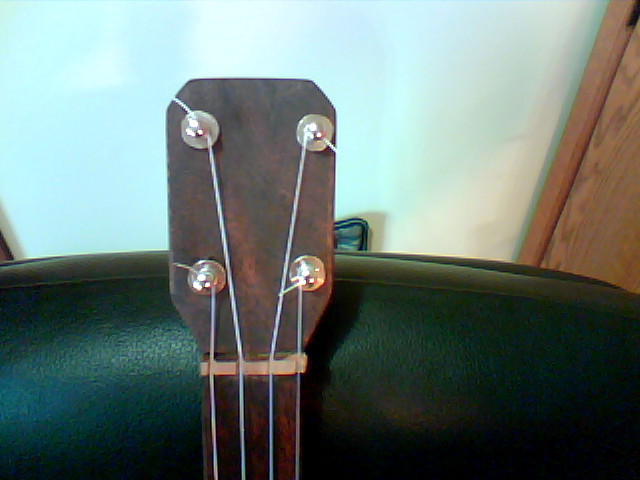 | 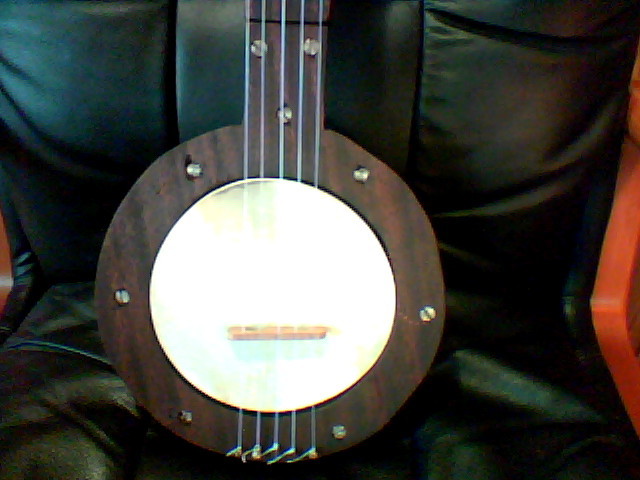 | 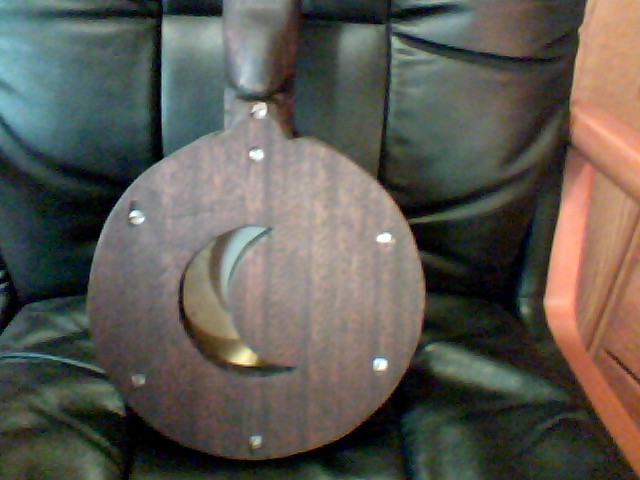 |
chip arnold - Posted - 11/29/2013: 14:42:55
Mickey, is your center piece attached to the top piece? I cut my center piece so that there is 5/8" clearance for the head to tack under the top and I attach the center to the bottom piece, not to the top. This makes it far easier to install the head. When finished, the neck, back and center of my banjos are glued together as one piece. Then the head goes into the top piece and the whole is held together by 6 or 8 screws from the back. The screws can be removed and the top comes right off for future head replacement. I think you'll find that the very sharp pointed upholstery tacks (Home Depot, Lowes, etc.) will hold better than thin staples. I do pre-drill pilot holes for them though, to avoid any splitting of the wood. The glue is very important. It can get a little sloppy with the very wet head and the wet glue but it's not hard and the final bond will be very secure.
Terms of Use | Privacy Policy | Privacy Consent (EU/GDPR Only)
Copyright 2026 Banjo Hangout. All Rights Reserved.


