
DVD-quality lessons (including tabs/sheet music) available for immediate viewing on any device.
Take your playing to the next level with the help of a local or online banjo teacher.
Weekly newsletter includes free lessons, favorite member content, banjo news and more.
Premier Sponsors





|
Please note this is an archived topic, so it is locked and unable to be replied to. You may, however, start a new topic and refer to this topic with a link: http://www.banjohangout.org/archive/173153/17
Page: 1 2 3 4 5 6 7 8 9 10 11 12 13 14 15 16 17 18
Noah Cline - Posted - 08/23/2014: 19:05:01
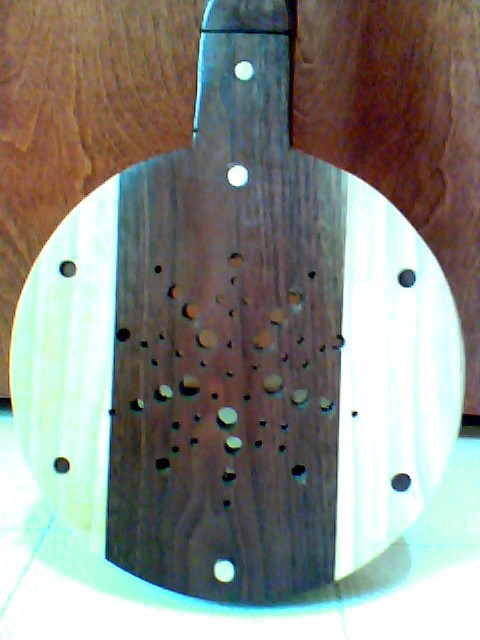
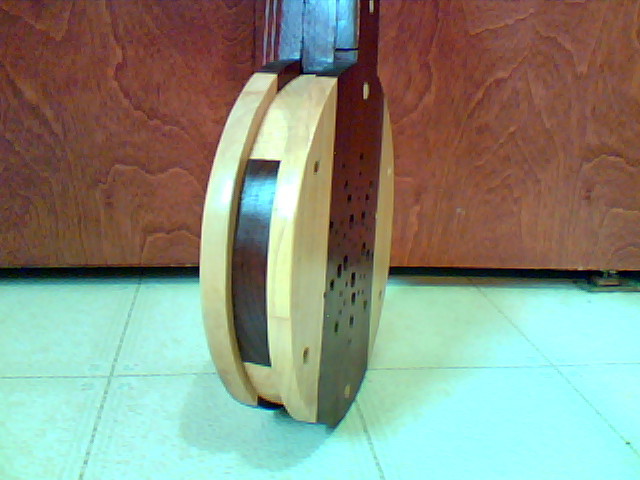
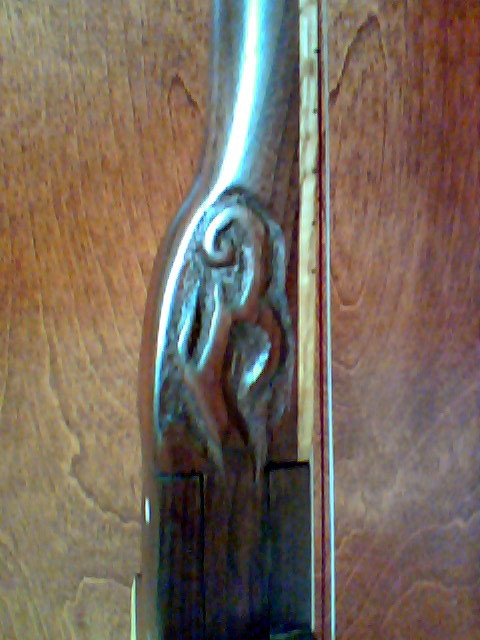
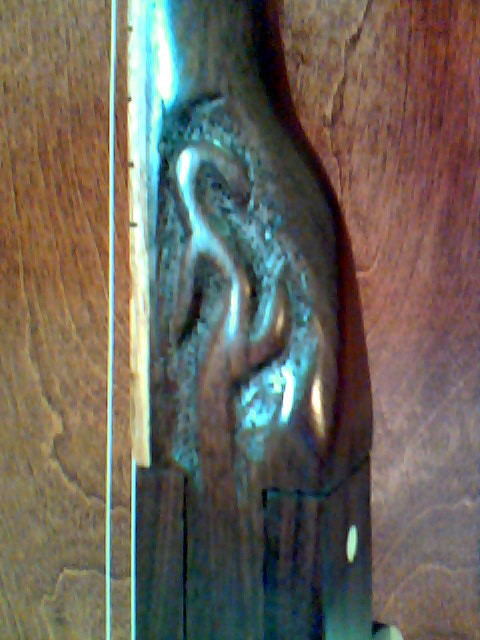
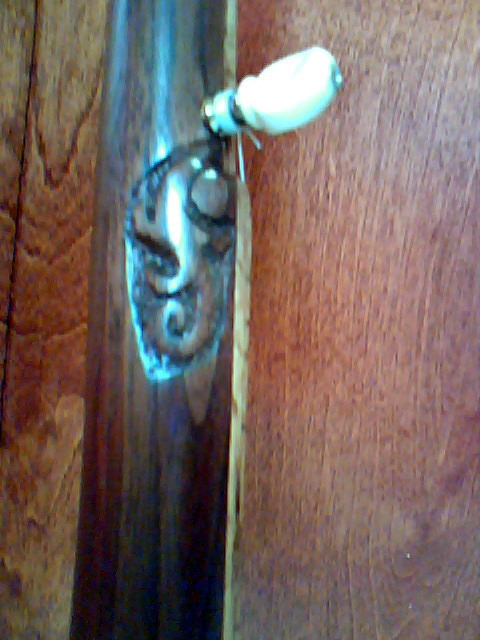
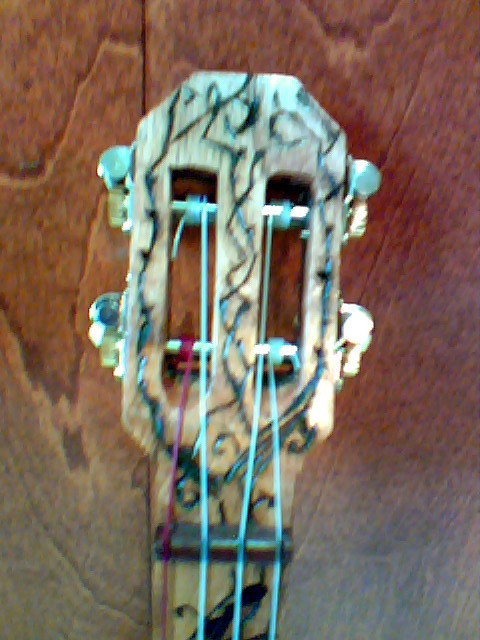
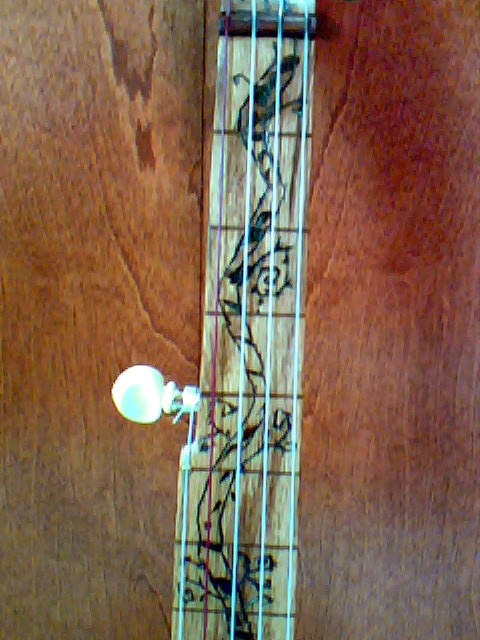
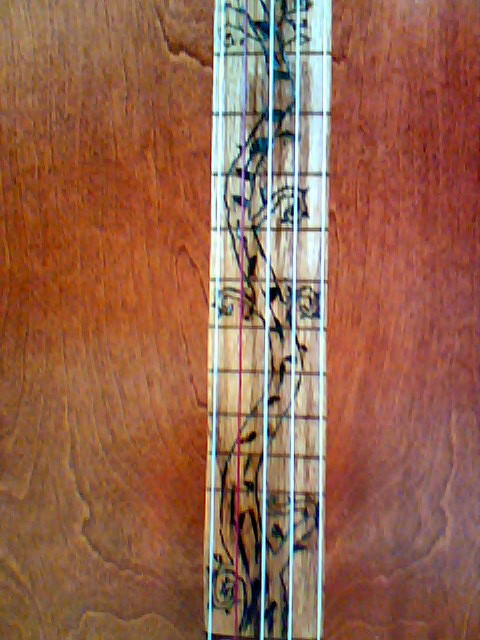
Semi-newest build:
Would have been for sale in the classifieds, but it was already claimed (not by me, but by my mom) ;)
 VIDEO: Mountain Banjo #10 -- A scale, slothead, flush fret (click to view) | 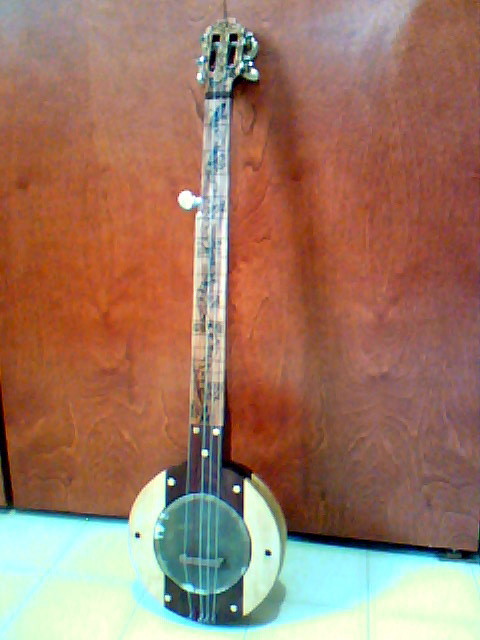 #10 A-scale flush fret | 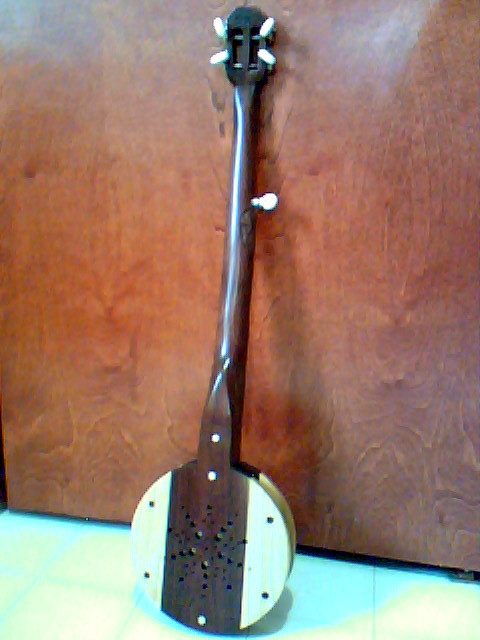 | 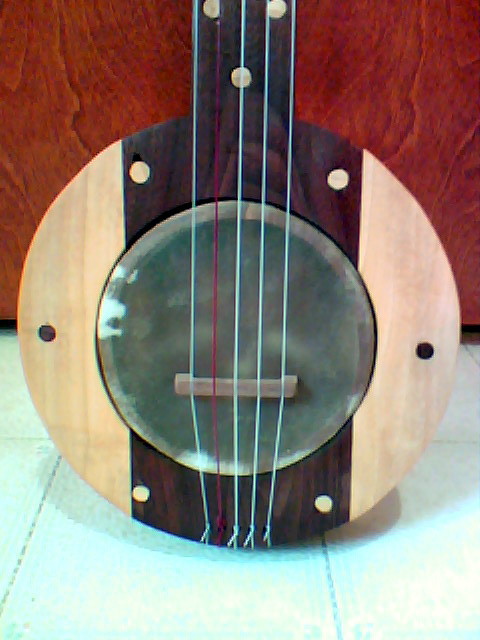 |
 |  |  |  |
 |  |  |  |
C Nyal de Kaye - Posted - 08/23/2014: 19:46:57
It looks good and sounds good Noah - well done again.
Hankon5 - Posted - 08/23/2014: 20:18:18
Noah....nice touch!!!! Thinking out of the box renders unique and wonderful looking axes!!! Great job!
MD1986 - Posted - 09/22/2014: 14:40:26
Hey All,
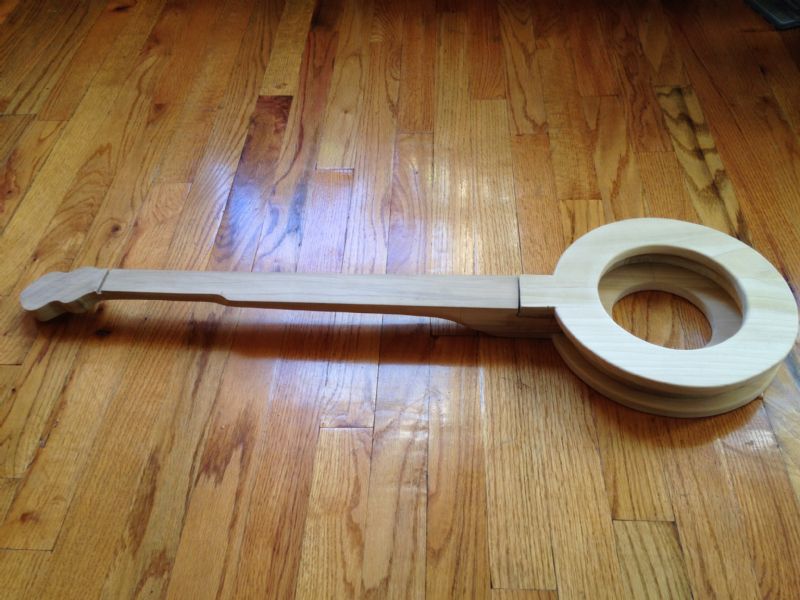
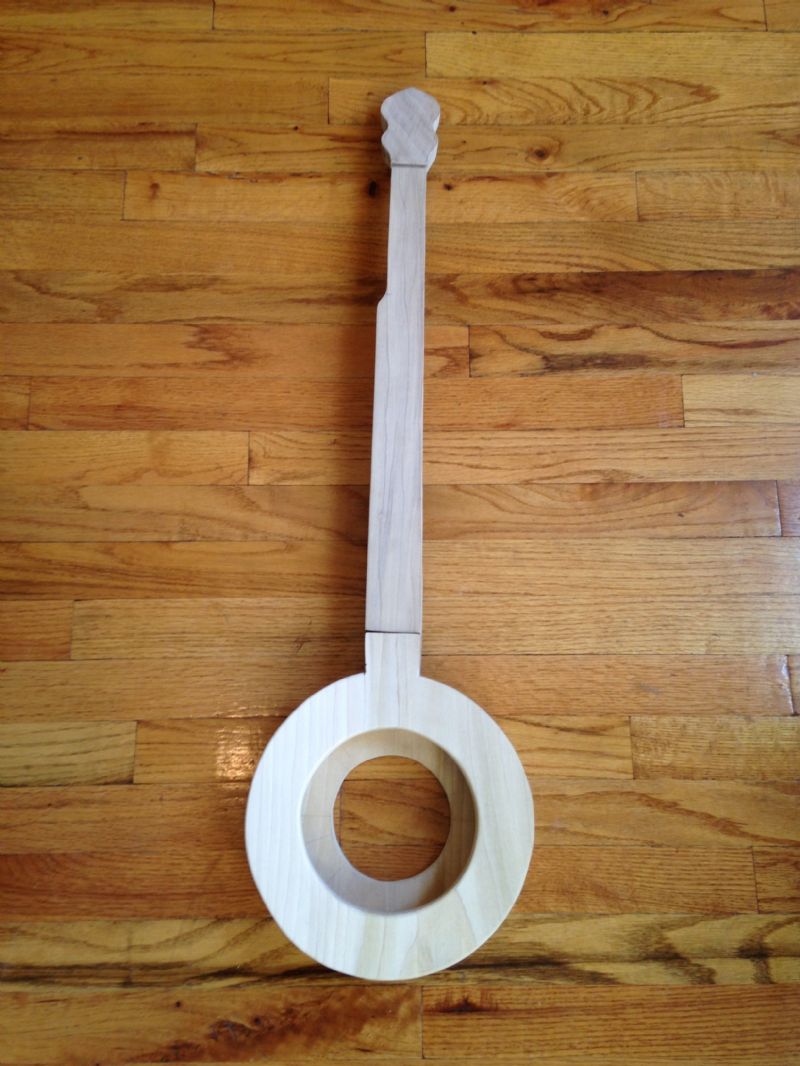
I'm currently building my 1st Mountain Banjo, based on the Frank Proffitt plans on the Bluestem website. The neck and pot are both Poplar as I did not went to spend so much money, assuming I'd be making plenty of mistakes.. which I am... Anyway, the pot and the neck are getting close to finished, and I just received some goatskin in the mail and plan on stringing it with Nylguts.. Today I cut out the slot for the nut, and attempted to make a nut out of scrap poplar. I have yet to drill the holes in the peghead for violin pegs that I will most likely order online. I hardly have any tools and so far have used only a jigsaw, a rasp and sandpaper. I don't expect this Banjo to be perfect, but would like to make the best of it.
At this moment these are my concerns,
1.) If i make the nut out of scrap Poplar will it sound just plain horrible? Knowing that just about all nuts are made from much harder material such as Bone, it seems crazy, but I'm trying to think mountainy and use what I have.. What other readily available options do I have that would work decently, and how important is it that the nut fit nice and snug? I cut the slot with a Jig saw somehow, and though its decent, it isnt good and squared and will have mostly likely have to use some glue, or get really lucky sanding down the nut shape to fit snug...
2.) For the violin pegs, I do not plan on purchasing a peg reamer at this point... I have read in a few posts about people wrapping a peg in sandpaper and slowly reaming out the hole that way.. Without a reamer, that seems like a smart option, but will it actually work??
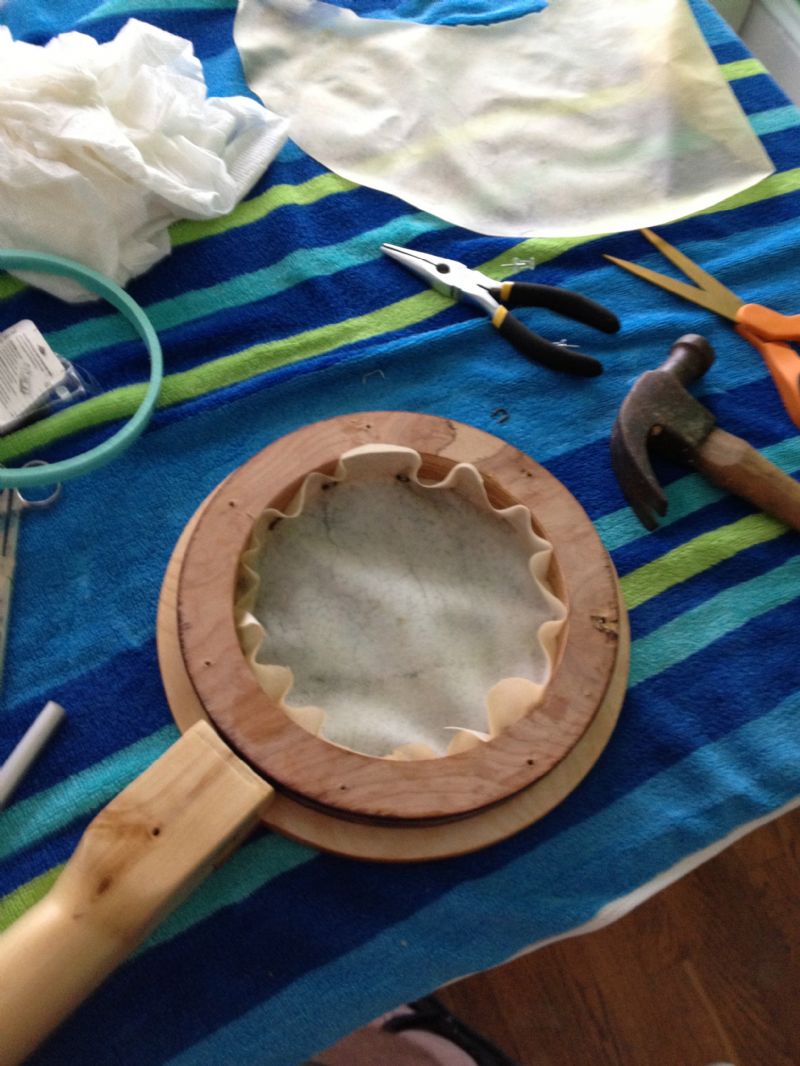
3.) Installing the head... There does not seem to be much specific information on how to actually install the skin head. I'd like to think I have a logical idea on what will work, but would appreciate hearing how others have made it happen.
Any thoughts would be greatly appreciated. Thanks!!
Here are a couple photos of what its looking like so far.
 |  |
Noah Cline - Posted - 09/22/2014: 15:49:48
Some of the poplar mtn. banjos that I've made had poplar nuts, and even some of the bridges. Since you're stringing it with Nylguts, they won't affect the nut as would steel strings, if that's your fear with it.
For the reamer, I've been using an inexpensive reamer set that you could find at a hardware store (the set that I got was around $15), and the skinny one works fine.
I'm sure others here will chime in with their thoughts...
BungleBanjo - Posted - 09/22/2014: 17:15:10
MD,
That banjo is looking great so far. I have used scrap wood for both my bridges and nuts. I've used maple, purpleheart, and poplar in the past. String pressure will do a lot to hold the nut but I know some people use a tiny drop of glue to hold it in place
For my head I have soaked the goatskin in a bucket of luke-warm water for an hour or so to soften it. I tack the first tack, then stretch it a little to the opposite side and put in the second tack. I work around the head that way. I also use a thin ring as I go to check to make sure I haven't tacked it in too tight. I have used nail-in staples as well as furniture tacks in the past. I think the furniture tacks work best but be sure to pre-drill your holes to prevent cracking. I've added some pictures of the process. Hopefully this helps--If not, feel free to ask questions.
Not sure about the violin pegs, I have always used machine tuners on mine
B
 Installing head | 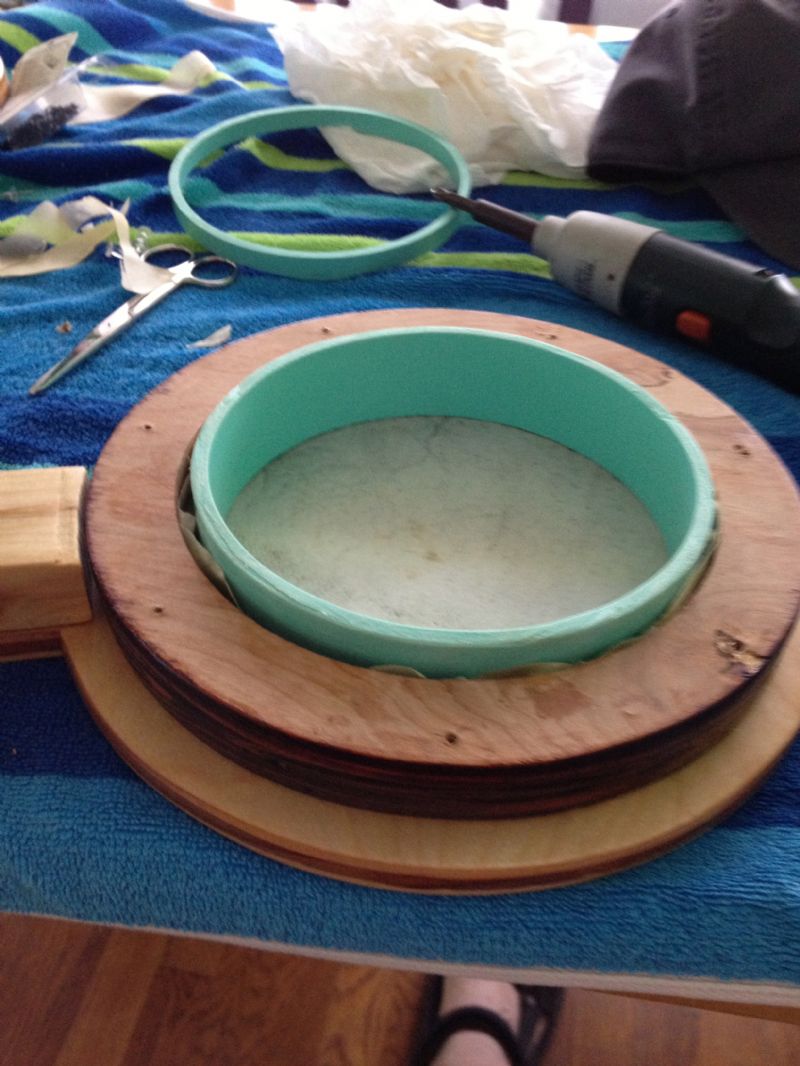 installing head2 | 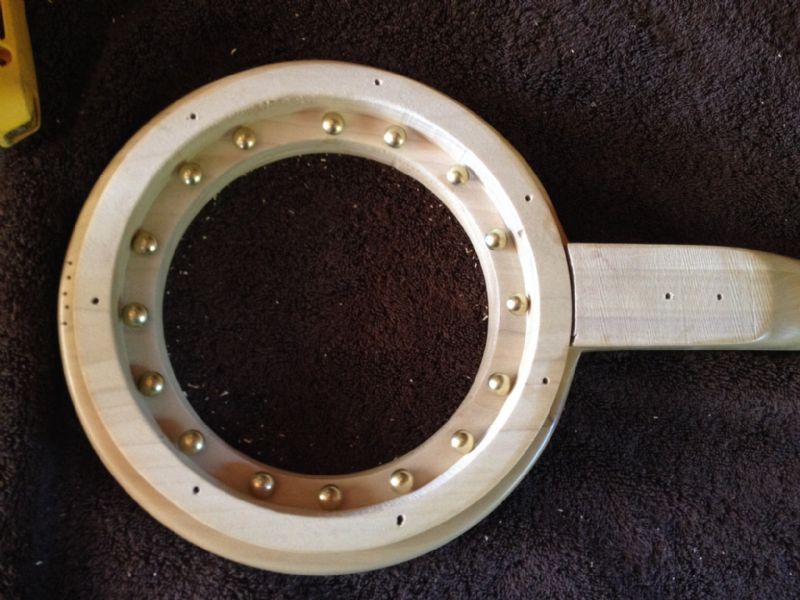 MountainBanjo2 |
Pete Moose - Posted - 09/23/2014: 07:11:10
quote:
Originally posted by chip arnoldHere's a maple banjo I just finished. Sold.
Nice building indeed Chip! We hardly find this kind of maple here in France, but tomorrow I have a flight to Oregon, I'll stay there for one month, and I 'll sure try to get some back home...(I wonder why the custom officer in Luxembourg uses to look at me that funny way? )
MD1986 - Posted - 09/23/2014: 07:15:40
Thanks for the response
Noah, Does the reamer set you're talking about work with standard violin pegs that you can get from stewmac, or are you making your own pegs? How do you go about doing your 5th string peg hole?
Bungle, Thanks for the photos and description. So it seems like the skin just needs to be nice and flat when checked with the thin rim, but not necessarily drum tight yet(?), which i'm assuming happens when it dries..
chip arnold - Posted - 09/23/2014: 07:28:27
MD ... I install the skin so that it is quite tight to begin with. I tack it so that it has to stretch 1/4" to screw the back of the pot to the top. A small head will not shrink a whole lot, so it's very important to get it tight to begin with. Also, I do not tack the head to the inside of the hole in the top ... I tack AND GLUE it to the underside of the top. My center ring has an inside diameter large enough that it does not interfere with the head/tacks. I use about 45 tacks and pre drill all the holes, so that the tacks are just snug. When all is dried, the glue is what actually holds it.
On the last banjo I built with fiddle pegs, I used a standard metal friction peg with a black button for the 5th string. In the past, I've cut a fiddle peg down and tapered the hole with sand paper wrapped around the peg. Not difficult if you begin with the correct size hole. I use a standard fiddle reamer for the peg head. A good quality reamer can be found for $30.00 or so.
Incidentally, you can get good deals on ebony or rosewood fiddle pegs from China. I get them via Ebay and have never had a bad one. They do take a week or two to get here, though.
Edited by - chip arnold on 09/23/2014 07:30:29
MD1986 - Posted - 09/23/2014: 14:39:10
Thanks for the information Chip, I will plan to pre drill all the holes for the tacks.. And for the glue.. What kind of glue is good for goatskin to wood?
Noah Cline - Posted - 09/23/2014: 15:08:14
quote:
Originally posted by MD1986
Thanks for the response
Noah, Does the reamer set you're talking about work with standard violin pegs that you can get from stewmac, or are you making your own pegs? How do you go about doing your 5th string peg hole?
Bungle, Thanks for the photos and description. So it seems like the skin just needs to be nice and flat when checked with the thin rim, but not necessarily drum tight yet(?), which i'm assuming happens when it dries..
I've made my own pegs for three of mine, using a shaper I made for them (I got the idea from smellyoldfatguy here on the BHO; he has a video showing it), but I've mostly used the Grover friction tuners and a metal fric. fifth.
chip arnold - Posted - 09/23/2014: 15:14:13
I use Tight Bond for the head as well as the wooden glue joints in the banjo. Never had a glue failure.
MD1986 - Posted - 09/23/2014: 17:10:59
Thank you all for the useful information!
However I have but one question that still lingers... Can the peg head holes actually be reamed by using a violin peg with sandpaper wrapped around it?
chip arnold - Posted - 09/23/2014: 18:16:47
However I have but one question that still lingers... Can the peg head holes actually be reamed by using a violin peg with sandpaper wrapped around it?
Yes. Drill the hole so that the peg, with sand paper will just start into it and it will work. Takes a bit of time, though.
If you're going to build more than one, buy a reamer!
MD1986 - Posted - 09/25/2014: 13:37:43
Once the violin pegs come in the mail, I'm going to give it a shot!
Annnnd I have another question...
What are some simple ways to make a tailpiece? Can I simply drill 5 holes through the rear of the top hoop and feed the string through a loop tied at one end of the string? Or perhaps could I tie a knot at the end of the string to prevent the string from pulling through the drilled holes? I am interested in the simplest, least material using method, that will still provide good tension and sound. Any Suggestions/Ideas?
Thanks Again!!!
chip arnold - Posted - 09/25/2014: 14:37:12
Take a look at the pics on my BHO page. I use five brass escutcheons. Drill holes just slightly smaller and knock them in, leaving them about 3/16" shy of flush. Tie a bowline in the string and Bob's your uncle!
google.com/webhp?sourceid=chro...pin+image
chip arnold - Posted - 09/25/2014: 16:47:07
Escutcheons have a nice looking, rounded head. much prettier than plain old nails. If Home Depot and Lowes haven't forced your local hardware store to shut down, you can get them there.
GSCarson - Posted - 09/25/2014: 19:01:33
A very special mountain banjo (to me...).
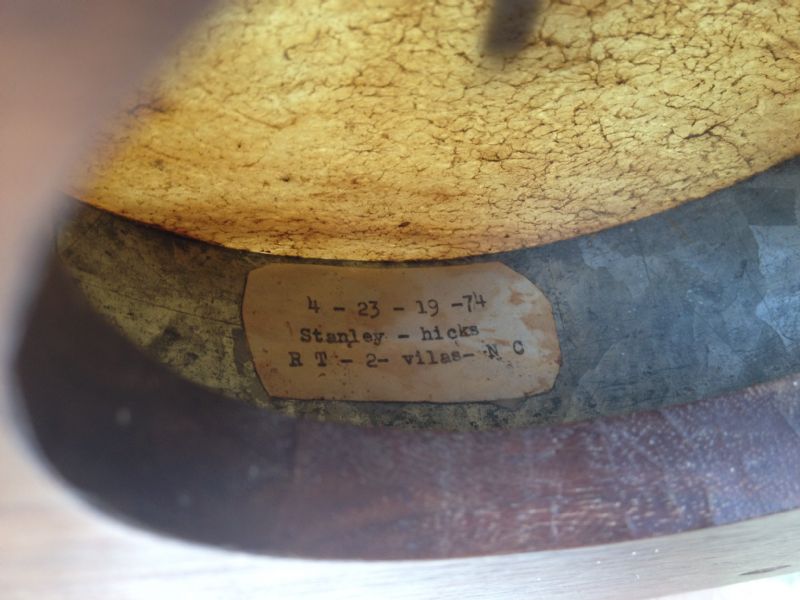
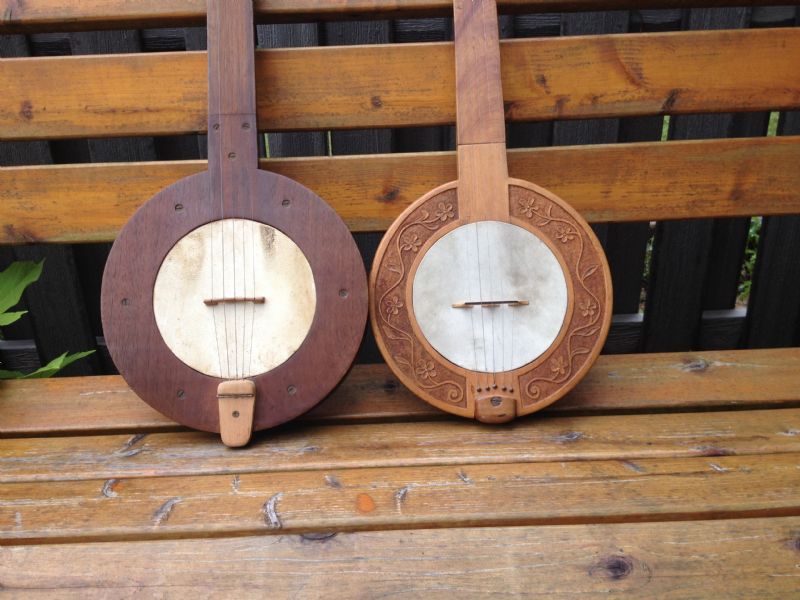
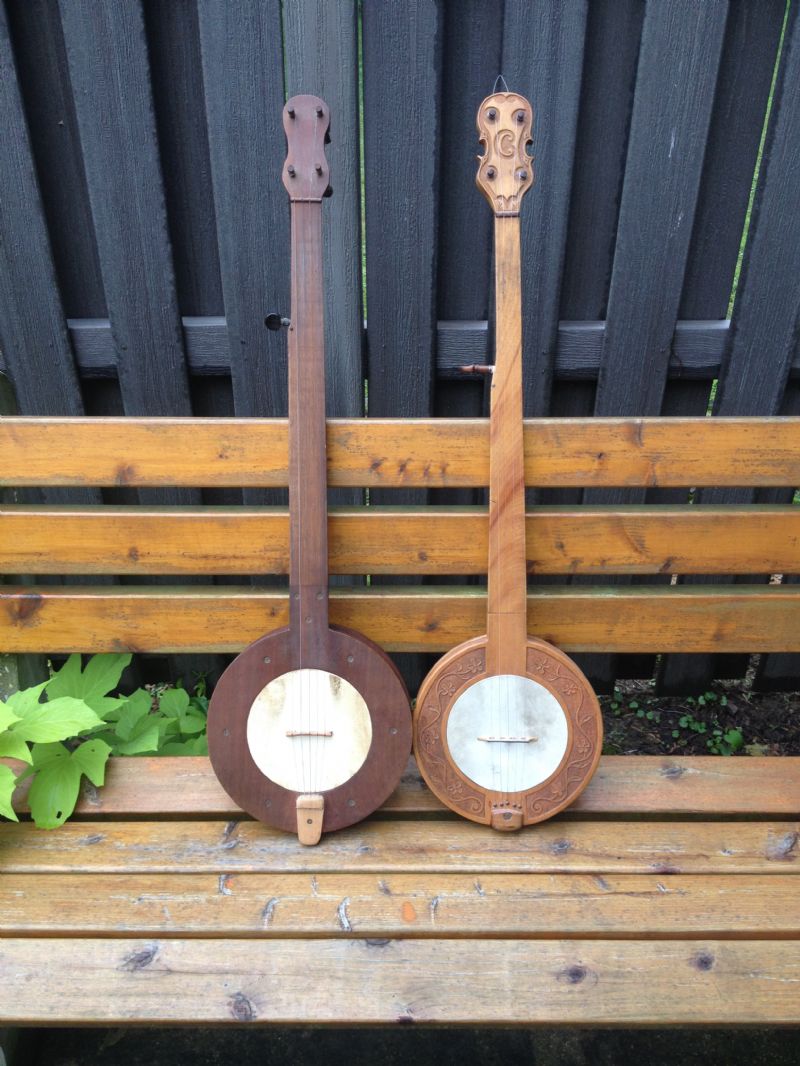
I wanted to share this on this thread. Last winter, my wife and I made a trip south to visit family and ended up visiting a few friends along the way. While on our way home, we spent a night with good friends who live in north Georgia. We had a great time, terrific meal and played music till late. My friend had a neat little walnut mountain banjo hanging in the living room. It was obviously older and seemed to be of the Glenn/Hicks variety, so I asked to see it. As I was playing it and we talked I learned it was THE Stanley Hicks banjo built by Stanley for Foxfire book # 3, the book and THE banjo that launched my personal banjo building adventures and changed my life dramatically. I was a little awestruck as for me that banjo is incredibly significant as it started a whole new path in my life. My friend worked at Foxfire back then and knew Stanley well.
I can trace many events in my life back to learning to build my first copy of that little banjo. I have learned so many life lessons and skills, including playing music, and just how to do things with my hands. The rewards of trying and doing something yourself with your own two hands. I built my first mountain fretless in 1975 right after Foxfire 3 came out and I saw that thing in it. I had almost no tools, a rasp, hand drill, rat tail file, and small block plane and pocket knife.... It was character building. I had not a clue about tuning or how to play it. I can trace the majority of my best life long friendships back to that banjo, including many people I still have the great pleasure of playing music with (including Reed Martin, Bob Buckingham), I bought the wood for my first banjo from George Orthey (well known autoharp builder) from a newspaper ad he had placed and he is still a close friend to this day. I can trace all of my professional jobs (all unrelated to banjos, but obtained due to relationships developed from people I somehow met through banjo building or music) back to that first banjo. I can trace being able to play music including with my wife and son, and my son Russ's experiences playing banjo for Audie Blaylock and Ricky Skaggs directly back to this little banjo.
I'm not really into collecting banjos or things personally, even though I have spent my fair share of time making lots of banjos and other collectible type wooden things since the 70's. Despite that, when I showed up at the Clifftop festival this year and was setting up our camp, I've gotta say that when my friend Pat walked back to our spot with that little walnut banjo in his hand and gave it to me, I was pretty shocked and really touched.
My first attempt was modeled on this banjo, and I've inserted a couple photos below to show the two. Although they look similar, Stanley's banjo sounds much, much better than mine. Its got a little deeper rim, and just rings compared to mine.
Here it is, hope you enjoy...
Glenn C.
 |  |  |  |
C Nyal de Kaye - Posted - 09/25/2014: 20:50:17
Thanks for the post Glen.
I too read about that banjo many years ago now so it was quite a pleasure to hear about it again.
What a lovely surprise to find it!
chip arnold - Posted - 09/26/2014: 07:03:16
Hey Glenn, what a great thing and a wonderful story! What is the little block with the screw, at the tail of the banjo?
Pat? Cool!
BungleBanjo - Posted - 09/26/2014: 07:24:53
MD, I drill 5 small holes in the top ring and tie the strings around the back of the ring.
GSCarson - Posted - 09/26/2014: 07:25:15
Hey Chip, Funny thing about the tailpieces. Both of them broke. On mine, I just ended up putting brass pins in place and using them. The original on the Hicks banjo broke a long time ago and someone made a replacement oak tailpiece. Glenn
BungleBanjo - Posted - 09/26/2014: 07:26:30
Glenn,
That is a great story! So nice to know that banjo is still around...
GSCarson - Posted - 09/26/2014: 08:10:45
Chip, Yep, the "tone ring" is stove pipe, sounds great. Glenn
rudy - Posted - 09/26/2014: 11:52:46
Glen, Thanks for sharing a truly special story!
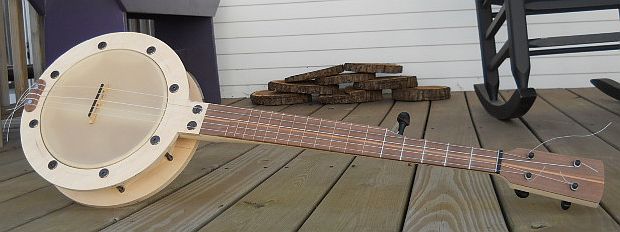
On an unrelated note, I'm working on a new prototype mountain design so I thought I'd throw up a couple of photos as food for thought. The photos shown here are using Baltic Birch plywood for the top and back, but I'm doing a new version using solid woods to be just a bit more in line with a traditional design. I've had the idea in the back of my mind for a long time to do a new mountain design that incorporates adjustable head tensioning, adjustable neck angle, and is easily adaptable to various configurations. I'm just getting around to doing something with it, although I've had a stack of special order 9" Renaissance heads waiting for quite a while...
I'll most likely do a feature on it on the Bluestem Mountain Banjo page as the "Tug Fork Mountain Banjo" when I get the final version done.
This one has a 9" adjustable tension Renaissance head, 5 nickel silver frets (the remainder of the board is at the same level as the fret tops and incorporates flush markers), zero fret, ebony pegs, Nylgut strings, walnut board with ogee scoop, Birch ply top and bottom, dowel stick and adjustable neck angle. The rear of the pot and center section are joined together and tension the head when the 8 furniture connector bolts are tightened. It works wonderfully.
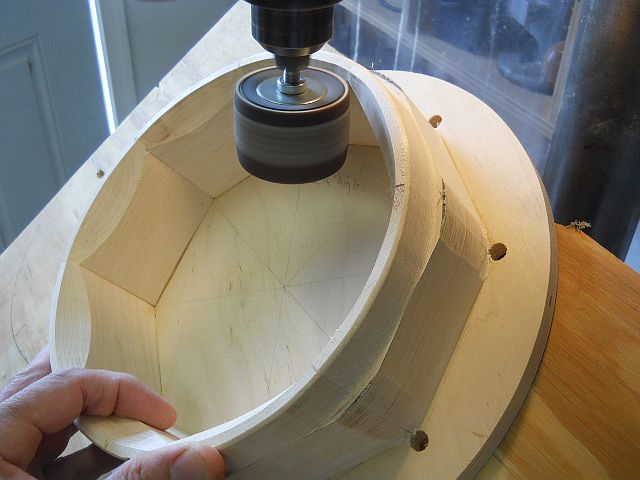 Pot Detail | 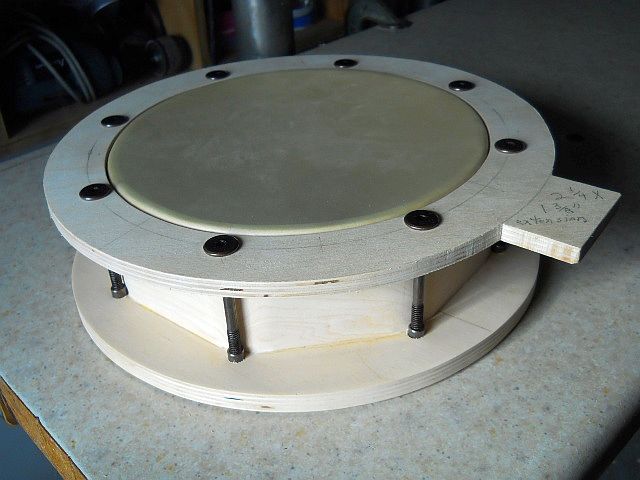 Pot Assembly |
MD1986 - Posted - 09/27/2014: 19:01:10
Well, I have hit a wall...
I received my Violin pegs in the mail and tried the sandpaper around the peg to ream a hole in a piece of scrap wood.. It is much more difficult than I had anticipated, and after a couple hours was unable to make it all the way through before I eventually threw in the towel. Maybe I wasn't doing it correctly.. If anyone has successfully done this and has any helpful tips I would love to hear them! Have some people glued the sandpaper to the peg? I had a bit of tape and was pinching the sandpaper tight. The hole I drilled in my sample wood was 1/4 inch diameter and the very tip of the peg just barely fits in there. I would really prefer to use this method as I'm not sure I will build more than one.
However, I am now reluctantly considering buying a reamer, and am now realizing that even if I do buy a reamer, it seems like that will not get my 5th string in! I have read that to make the 5th string hole it requires either cutting a reamer down to size, using the sandpaper on a peg method, or buying another, standard 5th string reamer and using a standard 5th string peg rather than a violin peg..I just can't decide what to do!..!?..!?..
Another seemingly less important thing I have been thinking about is what to use for the 5th string nut. Could I just use a slot head screw?
Thanks!
chip arnold - Posted - 09/27/2014: 19:28:41
I use a slot head screw for the pip. Use a file, sandpaper or something to dress the slot so that no sharp edges will fray the string.
Pegs ... I have done this successfully a number of times, Drill your hole a little bigger, so that you get more sand paper in. Wrap the paper in the right direction, so that it tends to get tighter on the peg as you rotate it. Turn the peg in one direction only, not back and forth. Use a coarse paper and finish with a fine one. Pull the peg out often to clear the dust. Otherwise, it'll clog and not sand.
rudy - Posted - 09/29/2014: 05:31:19
A scrap of ebony or matching hardwood can also be easily shaped to make a fifth string nut.
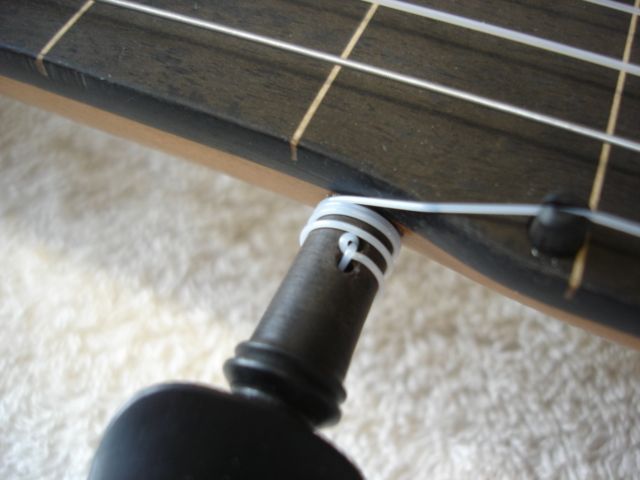
MD1986 - Posted - 09/29/2014: 10:50:55
Thanks once again Chip!
I got a slightly larger drill bit and was able to figure out how to make the sandpaper around the peg work. It's far from perfect and will be tricky to tune, but it seems like it work, including the 5th string. I plan on using a slotted screw for the 5th string nut.
Now my latest concern is about the nut and bridge. I have made them both out of scrap poplar, and have only cut the string slots out of the nut. I did so by screwing a 1/16 drill bit just barely through the top of nut which creates round bottomed slots. Compared to a normal nut, the string slots are much larger at 1/16 of an inch each. I know that these slots will surely let a string pass through them, although I'm not sure about the specifics on string size to slot size and how it could affect the sound. If this is a bad idea I will not use the same process when making the slots in the bridge..
Again, I don't have many tools and am trying to make it work!
chip arnold - Posted - 09/29/2014: 12:57:32
Should be okay for the nut. If you don't have a tool for slotting the bridge, you could take a kitchen knife and a fold of sand paper over it. That would produce a narrow, round bottomed slot. Never tried it, but seems like it would work. A coping saw blade may be narrow enough, too.
chip arnold - Posted - 09/29/2014: 12:59:30
I just put up a tab for Cold Frosty Morning on the Mountain Banjo site. Also, Linda has put up a fiddle section, with pics, descriptions and prices on some of her fiddles.
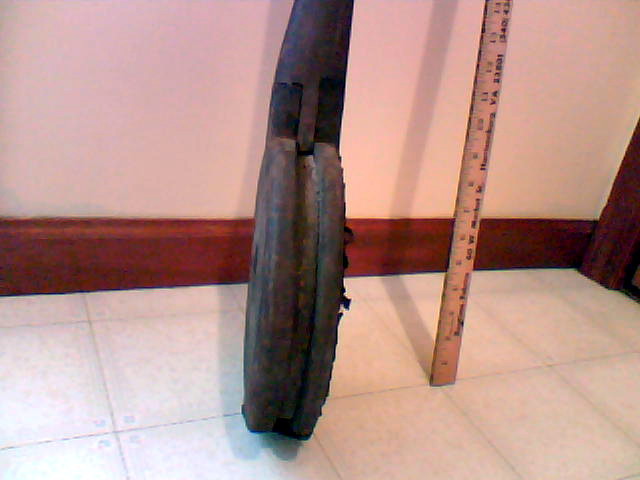
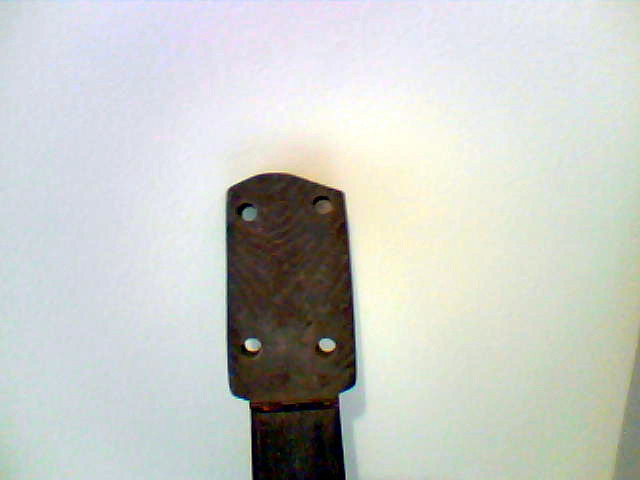
Noah Cline - Posted - 10/10/2014: 18:04:07
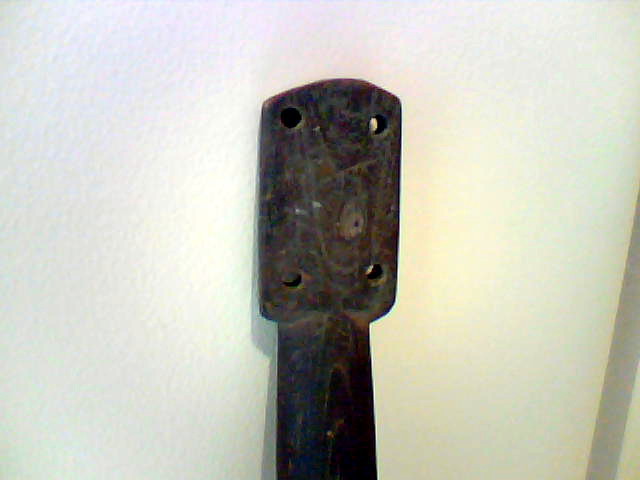
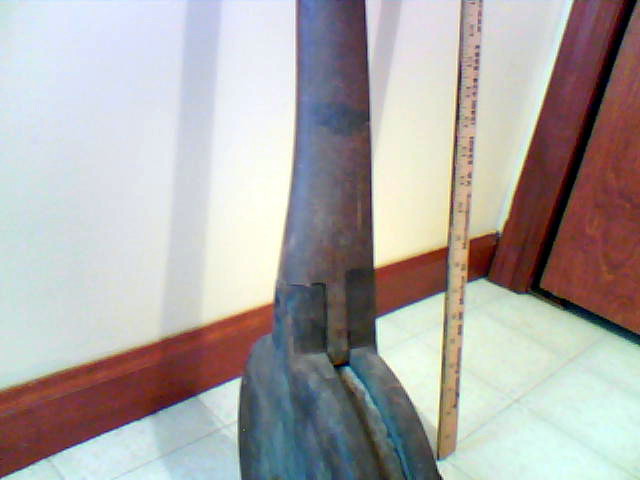
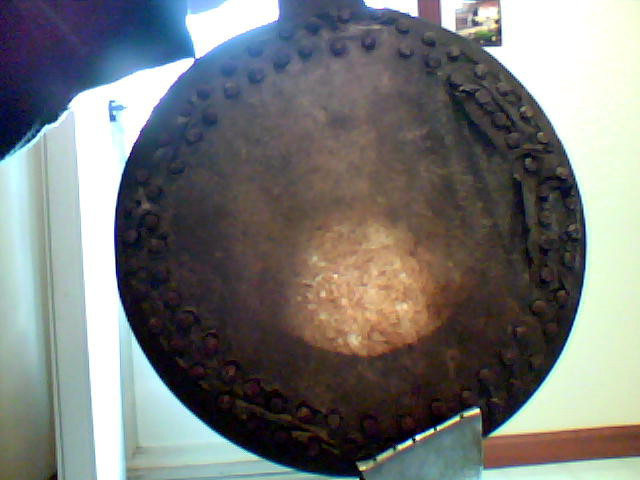
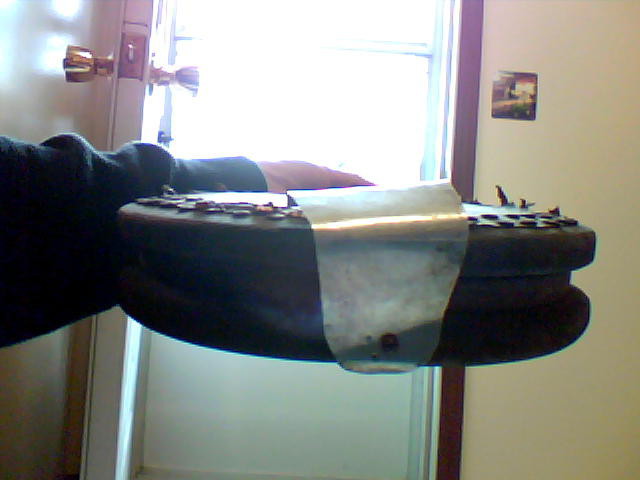
Just finished restoring this old mountain banjo last week.
I'm really surprised at the sound and tone of it.
 VIDEO: Old Mountain Banjo -- Josie-O/Cumberland Gap (click to view) | 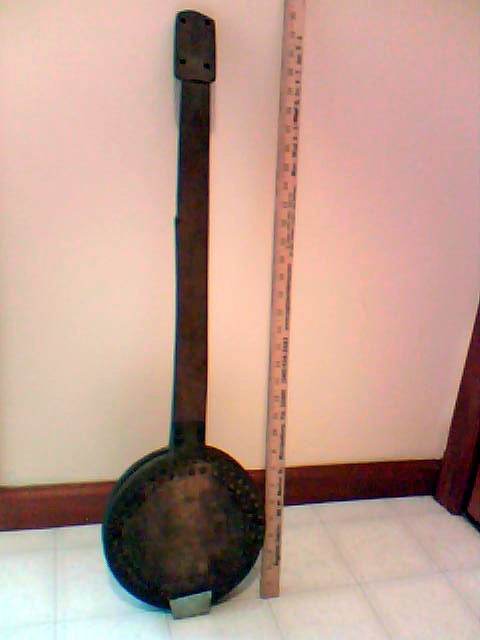 Old Mountain banjo (VA) | 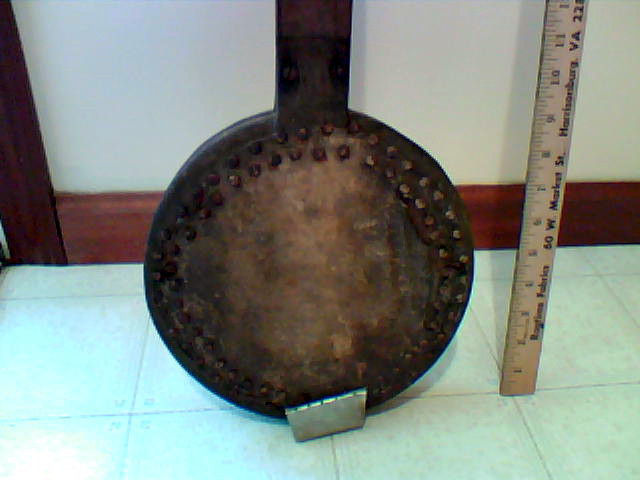 | 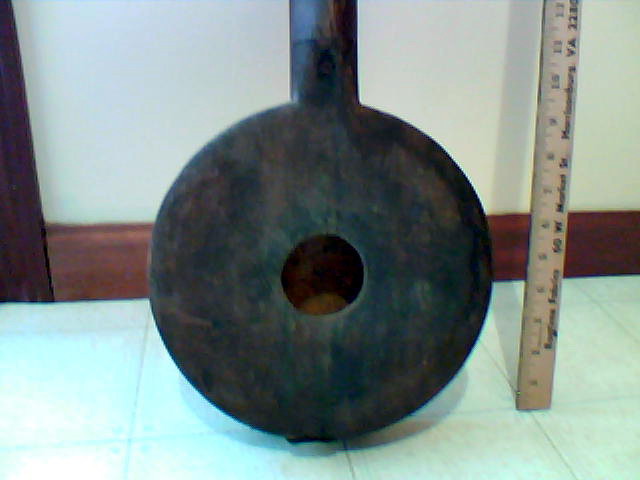 |
 |  |  |  |
 |  |  |  |
etparadox - Posted - 10/11/2014: 00:52:31
Nice one! Deep sounding banjo and clean playing. How many mountain banjos are you up to now?
rudy - Posted - 10/11/2014: 07:09:08
quote:
Originally posted by MD1986
Thanks once again Chip!
I got a slightly larger drill bit and was able to figure out how to make the sandpaper around the peg work. It's far from perfect and will be tricky to tune, but it seems like it work, including the 5th string. I plan on using a slotted screw for the 5th string nut.
Now my latest concern is about the nut and bridge. I have made them both out of scrap poplar, and have only cut the string slots out of the nut. I did so by screwing a 1/16 drill bit just barely through the top of nut which creates round bottomed slots. Compared to a normal nut, the string slots are much larger at 1/16 of an inch each. I know that these slots will surely let a string pass through them, although I'm not sure about the specifics on string size to slot size and how it could affect the sound. If this is a bad idea I will not use the same process when making the slots in the bridge..
Again, I don't have many tools and am trying to make it work!
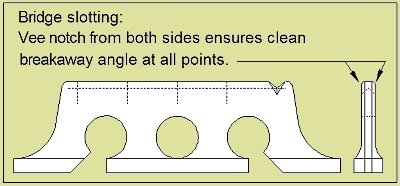
I gave up slotting bridges years ago; it's the easiest way to create a string buzz problem that I know. A small triangular file can be used to form a V groove from both sides of the bridge which will result in a clean breakaway point for the string in all directions.
Noah Cline - Posted - 10/12/2014: 12:31:43
quote:
Originally posted by etparadox
Nice one! Deep sounding banjo and clean playing. How many mountain banjos are you up to now?
11 so far.
Was excited to work on bringing some life back in this oldie.
chip arnold - Posted - 10/17/2014: 20:34:22
I've just finished another mtn banjo. The pot is the most beautiful ambrosia (it's a beetle) maple. Tomorrow it gets strings and a mercury dime inset into the headstock. Looking for a home.
Edited by - chip arnold on 10/17/2014 20:37:52
Noah Cline - Posted - 10/18/2014: 08:09:41
quote:
Originally posted by chip arnoldI've just finished another mtn banjo. The pot is the most beautiful ambrosia (it's a beetle) maple. Tomorrow it gets strings and a mercury dime inset into the headstock. Looking for a home.
That is really pretty!
chip arnold - Posted - 10/18/2014: 18:55:56
Thanks, Noah. It sounds really good, too. I started another tonight. Curly maple top and bottom plates with walnut center. Matchbooked curly maple neck with walnut center strip. I really want to make another cookie tin banjo soon, too.
chip arnold - Posted - 10/23/2014: 08:37:53
Ambrosia maple mtn banjo in the classifieds ... banjohangout.org/classified/47563
janolov - Posted - 10/24/2014: 06:03:09
quote:
Originally posted by chip arnoldAmbrosia maple mtn banjo in the classifieds ... banjohangout.org/classified/47563
I like that wood! It has wonderful grains and you seem to have taken well care of the life of the wood.
BBanjers - Posted - 10/24/2014: 11:12:36
Just finishing my latest mountain banjo. Black Walnut with Rosewood fingerboard and a calf skin head.
I have to say, the peghead was a real pain in the butt to get into and clean up!
rudy - Posted - 10/25/2014: 05:35:50
quote:
Originally posted by BBanjers
Just finishing my latest mountain banjo. Black Walnut with Rosewood fingerboard and a calf skin head. I have to say, the peghead was a real pain in the butt to get into and clean up!
Same way I felt when building my first F style mandolin and also (my one and only) banjo heel carving,
Sometimes you just get overtaken by the beauty to the point of being willing to put in the inordinate amount of time some forms of superfluous decoration entails.
chip arnold - Posted - 10/25/2014: 06:48:45
Leon, that's a beautiful job. I was admiring it yesterday on the new FB mountain banjo page. You've inspired me to build one with a more minstral-ish style neck and head stock.
CEParagon124 - Posted - 10/25/2014: 09:24:18
I've read this entire thread over the last few days.
Fascinating to see all the really great banjos ya'll have made and the sound bites are nice, also.
I realize that you all have progressed the builds beyond the old coffee can tone ring designs, but for anyone that still likes that traditional style, here's a tip.
I was in a "Thrift Store" the other day, one run by a local Christian denomination, and in the houseware section came across an entire shelf of decorative tins, the kind you see with Hershey's Kisses, Lion Brand peppermint sticks, etc. They were of varying sizes and each no more than forty-nine cents.
So, if you have such a store in your area, you might find some useable tins there.
Keep up the good work. It's a banjo niche that should be kept alive and growing.
Charlie Noyes
chip arnold - Posted - 10/25/2014: 10:51:19
CEParagon ... I have used stovepipe for a stretcher in mountain banjos, but prefer the less tinny sound of PVC.
Cookie tin banjos are easy and fun to make. Here are pics of a recent one which found a home in Ca. a week ago. It has a white oak neck with a red oak center strip. The sound hole is a shower drain cover and the tailpiece is a dinner fork.
banjohangout.org/myhangout/pho...umid=9186
Terms of Use | Privacy Policy | Privacy Consent (EU/GDPR Only)
Copyright 2026 Banjo Hangout. All Rights Reserved.


